

The video production process is the structured sequence of planning, shooting, and editing that transforms a raw idea into a compelling, audience-ready video. Professionals call it a production workflow, and it divides into three distinct phases: pre-production, production, and post-production. Mastering all three is what separates polished, high-performing content from footage that never quite lands. Whether you’re producing a brand film, a social media series, or a documentary short, the same core framework applies. This guide walks you through every stage with the specificity and clarity you need to execute well.
What are the core stages of the video production process?
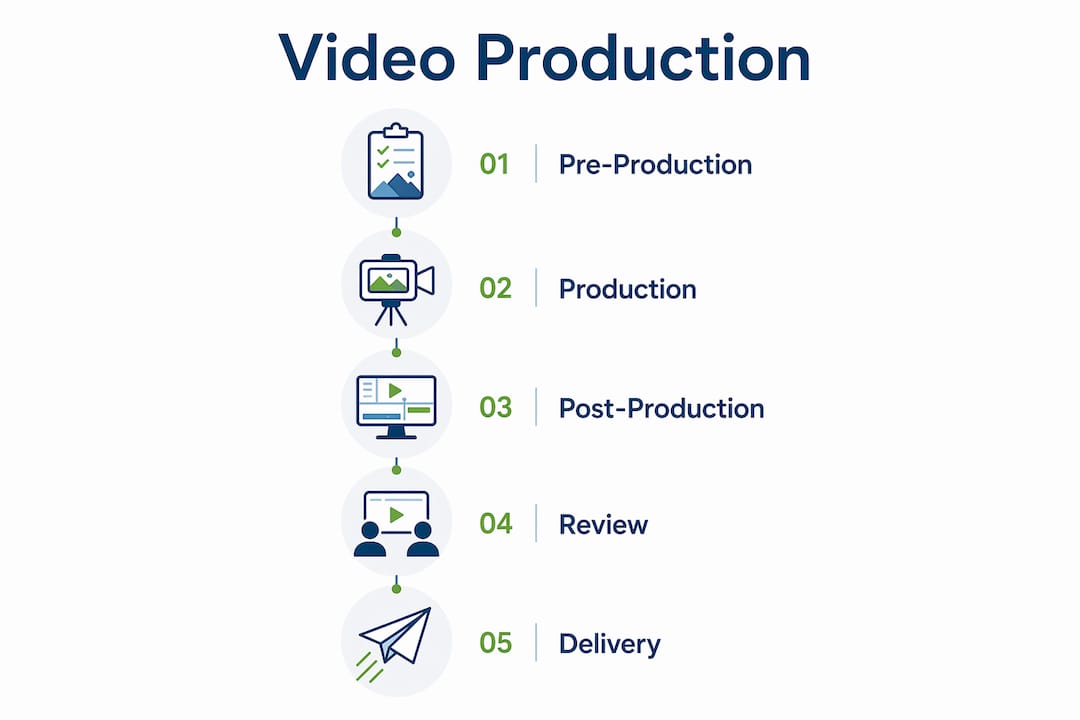
The video production process guide starts with understanding how time actually distributes across a project. Pre-production consumes 30 to 40% of total project time, production takes 10 to 20%, and post-production accounts for 40 to 60%. That breakdown surprises most first-time producers who assume shooting is the biggest time investment. The reality is that editing, color grading, and revisions demand far more hours than the shoot itself.
Here is how each stage functions in a professional workflow:
- Pre-production covers everything before the camera rolls. This includes writing the script, building the storyboard, scouting locations, booking talent, assembling the crew, and finalizing the shot list. It also means locking the budget and setting a realistic timeline with clear milestones.
- Production is the shoot itself. The crew executes the plan, captures all scripted shots plus B-roll, records clean audio, and manages on-set logistics. This phase is the shortest in duration but the most expensive per hour, which is why thorough pre-production directly protects your budget.
- Post-production transforms raw footage into a finished video. Editors select the best takes, build the cut, apply color grading, mix audio, add graphics and captions, and prepare platform-specific versions for delivery.
Pro Tip: Treat post-production time as a non-negotiable budget line from day one. Underestimating it is the single most common cause of missed deadlines on video projects.
Each stage feeds directly into the next. Weak pre-production creates chaos on set. A disorganized shoot creates a nightmare in the edit. The workflow is only as strong as its weakest phase.
How to plan effectively during pre-production
Early, thorough pre-production planning is the key factor in smooth shoot days and on-budget delivery. The goal of this phase is to eliminate as many unknowns as possible before any money is spent on crew or equipment.
A solid pre-production checklist covers these core areas:
- Objectives and messaging: Define the video’s purpose, the single key message, and the intended audience before writing a single line of script.
- Budget and timeline: Set a realistic budget with contingency, then map out a production calendar with approval deadlines built in.
- Script and storyboard: A B2B video under 3 minutes typically runs 350 to 450 words and requires 2 to 3 review rounds before the shoot. Lock the script before any other creative work begins.
- Location scouting: Visit every location in person or via detailed video walkthrough. Check for ambient noise, lighting conditions, permit requirements, and access logistics.
- Talent and crew booking: Confirm all agreements in writing, including usage rights for on-camera talent.
- Equipment checklist: List every piece of gear by shoot day and assign responsibility for each item.
One of the most underused tools in pre-production is the video brief. A strong brief locks deliverables by platform, aspect ratio, subtitle needs, and versioning requirements before the shoot begins. Defining these details early prevents expensive reframing and captioning work in post.
| Pre-production task | Why it matters |
|---|---|
| Script with defined review rounds | Prevents scope creep and late-stage rewrites |
| Video brief with platform specs | Eliminates last-minute versioning surprises |
| Location scout with audio check | Avoids unusable footage from noise or lighting issues |
| Signed talent agreements | Protects usage rights and avoids legal delays |
Modern pre-production workflows can compress what once took two to three weeks into two to five business days using digital templates, cloud-based collaboration tools, and shared approval platforms. Tools like Frame.io, Google Docs, and Notion allow distributed teams to review scripts, share location photos, and sign off on storyboards without a single in-person meeting.
Pro Tip: Designate a single point of contact for every approval stage. Consolidated feedback from one decision-maker cuts revision cycles in half compared to collecting notes from multiple stakeholders simultaneously.
For outdoor and action-focused productions, pre-production planning for outdoor video adds weather contingencies, safety protocols, and permit timelines that indoor shoots simply do not require.
What happens during production and how to manage shoot days efficiently?
Production is where the plan meets reality. The best crews treat the shot list as a living document, not a rigid script. They capture every planned shot and stay alert for unscripted moments that serve the story better.
Efficient shoot days depend on a few non-negotiable practices:
- Set up audio first. Poor audio ruins more footage than poor lighting. Use lavalier microphones for interviews, a boom mic for dialogue, and always monitor levels in real time.
- Follow the shot list, but capture extra B-roll. B-roll is the editor’s safety net. Capture at least twice as much as you think you need, especially for outdoor and action sequences where conditions change fast.
- Assign clear on-set roles. Every person on set should know their specific responsibilities. Ambiguity costs time and creates tension.
- Back up footage at the end of every shoot day. Use the 3-2-1 rule: three copies, on two different media types, with one stored off-site or in the cloud.
A clear production-to-post handoff must specify file formats, delivery timelines, and responsible parties. Ambiguous handoffs cause time-consuming rework that eats into post-production budgets. Before wrapping the final shoot day, confirm that the editor has received all files, understands the naming convention, and knows the first review deadline.
Pro Tip: Do a quick end-of-day review of the day’s footage on set before the crew disperses. Catching a missed shot or a technical error on the day is always cheaper than scheduling a reshoot.
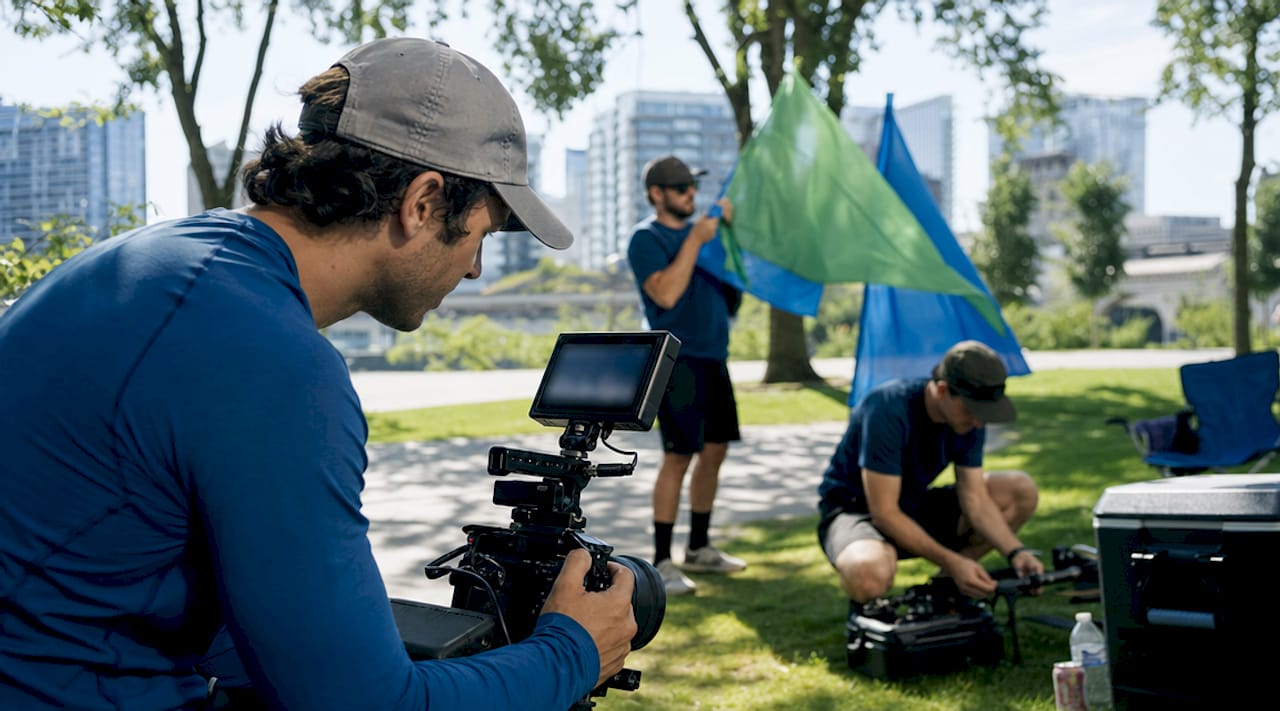
For creators working in dynamic outdoor environments, capturing action footage effectively requires additional planning around athlete timing, natural light windows, and camera positioning that static shoots do not demand.
How to maximize quality and efficiency in post-production
Post-production is where the story actually gets told. Raw footage is just raw material. The edit, the color, the audio mix, and the graphics are what give a video its emotional impact and professional finish.
A structured post-production workflow follows this sequence:
- Ingest and organize footage. Label all clips by scene, shot number, and take before touching the timeline. Adobe Premiere Pro, DaVinci Resolve, and Final Cut Pro all support bin structures that make this fast.
- Build the assembly cut. Place every usable clip in sequence without worrying about pacing. This is the rough skeleton of the video.
- Refine to a rough cut. Tighten pacing, cut redundant material, and establish the narrative arc. This is the version that goes to the first client review.
- Lock picture before color and audio work. Picture lock is critical before color grading, VFX, and audio mixing begin. Any structural changes after this point require regrading and remixing, which multiplies revision costs.
- Color grade for consistency and brand alignment. Use LUTs as a starting point, then adjust for skin tones, environment, and brand color standards.
- Mix audio and add music. Balance dialogue, ambient sound, sound effects, and music. Export stems separately so platform-specific versions can be adjusted without a full remix.
- Add graphics, titles, and captions. Captions are no longer optional. They improve accessibility and significantly increase watch time on social platforms where autoplay runs silent.
Post-production typically involves 2 to 3 revision rounds to balance quality and timeline. More than three rounds usually signals a problem in the approval process, not the edit itself.
Versioning for multiple platforms must be planned in post-production from the start. Last-minute reframing for vertical formats or adding captions after final delivery is costly and time-consuming. Plan your 16:9, 9:16, and 1:1 exports at the beginning of the edit, not as an afterthought.
Separating review and approval stages and using a single feedback platform prevents the revision chaos that derails timelines. Tools like Frame.io and Wipster allow clients to leave time-coded comments directly on the video, which eliminates the confusion of email-based feedback threads.
Pro Tip: Use a video production basics course to build fluency in post-production fundamentals before taking on complex projects. Understanding the theory behind color science and audio mixing makes you a better communicator with your editor, even if you never touch the software yourself.
Key takeaways
A professional video production workflow succeeds when pre-production is thorough, production follows a locked shot list, and post-production runs through defined approval gates with platform versioning planned from the start.
| Point | Details |
|---|---|
| Time allocation matters | Post-production takes 40 to 60% of total project time; budget accordingly from day one. |
| Lock the brief early | Define platform specs, aspect ratios, and versioning needs before the shoot begins. |
| Picture lock before finishing | Never start color grading or audio mixing until the edit structure is final. |
| Limit revision rounds | Cap post-production feedback at 2 to 3 structured rounds to protect timelines and budgets. |
| Back up on shoot day | Apply the 3-2-1 backup rule before the crew leaves set to prevent irreversible data loss. |
What I’ve learned from years of shooting in the field
The most common mistake I see from creators and marketers entering video production is treating pre-production as optional. They want to get to the shoot. The shoot feels like progress. Pre-production feels like paperwork. That instinct is expensive.
On every project I’ve run, whether it’s a mountain biking film in the Swiss Alps or a commercial shoot for an outdoor brand, the shoots that went smoothly were the ones where every decision was already made before we arrived on location. Talent confirmed. Shot list locked. Weather contingency planned. The shoots that went sideways were always the ones where someone said, “We’ll figure it out on the day.”
The other thing I’d push back on is the idea that more gear equals better video. I’ve seen creators obsess over camera bodies and lenses while neglecting audio, lighting, and story structure. A Canon EOS R5 with a bad script and no shot list produces worse content than a mid-range camera with a tight plan and a clear message. Gear matters, but it’s the last variable, not the first.
Finally, visual storytelling is a skill that compounds. Every project teaches you something that makes the next one faster and better. Build your workflow, document what works, and refine it with each production. That’s how you get from good to consistently great.
— Martin
Take your video production further with Bissig
If you’re ready to move beyond theory and see what a structured, professional production workflow looks like in practice, Bissig’s work across outdoor, action, and adventure videography shows exactly what’s possible when every stage is executed with precision. From pre-production planning to final delivery, the difference between average and exceptional content comes down to craft and process. Explore outdoor videography techniques for dynamic storytelling to see how professional production translates into content that genuinely moves audiences. For brands looking to understand the full value of videography for marketing, Bissig’s portfolio and client work offer a clear benchmark.
FAQ
What are the three stages of video production?
The three stages are pre-production, production, and post-production. Pre-production covers planning and scripting, production is the shoot, and post-production handles editing, color, audio, and delivery.
How long does video post-production take?
Post-production typically accounts for 40 to 60% of total project time and involves 2 to 3 structured revision rounds. Complex projects with multiple platform versions require more time.
Why is pre-production the most important phase?
Pre-production eliminates unknowns before money is spent on crew and equipment. Thorough planning directly prevents costly reshoots, revision overruns, and missed deadlines during production and post-production.
What is picture lock in post-production?
Picture lock is the point at which the edit structure is finalized and no further cuts are made. Color grading, audio mixing, and VFX work all begin after picture lock to avoid costly rework.
How many revision rounds should a video project include?
Professional workflows cap revisions at 2 to 3 structured rounds. More than three rounds typically signals unclear approval processes rather than problems with the edit itself.


