
Getting sharp, compelling shots of athletes in motion is one of the most technically demanding things you can do with a camera. This adventure sports photography guide exists because most beginner resources stop at “use a fast shutter speed” and leave you to figure out the rest. What actually separates forgettable action shots from images that stop a scroll is a combination of preparation, technique, and storytelling instinct. This guide covers all three, drawing on real-world experience from professional outdoor photographers including insights from Bissig, a Swiss-based adventure and mountain biking photographer.
Table of Contents
- Key takeaways
- Your adventure sports photography guide to gear
- Camera settings for sharp action shots
- Composition and lighting strategies
- Shooting in challenging conditions
- Post-shoot workflow and editing
- My honest take on what actually makes this work
- Take your adventure photography further with Bissig
- FAQ
Key takeaways
| Point | Details |
|---|---|
| Gear should be light and durable | Mirrorless bodies with fast zoom lenses give you image quality without the weight penalty on long approaches. |
| Shutter speed is non-negotiable | Shoot at 1/1000s or faster to freeze action and reduce motion blur in fast-moving sports. |
| Orientation shapes storytelling | Shoot mostly in landscape orientation to capture environmental context and preserve cropping flexibility. |
| Lighting position changes everything | Place the sun behind you and favor early morning or late afternoon light for richer, more dimensional images. |
| Post-shoot workflow matters | Consistent selection and editing habits build a stronger portfolio faster than shooting more frames. |
Your adventure sports photography guide to gear
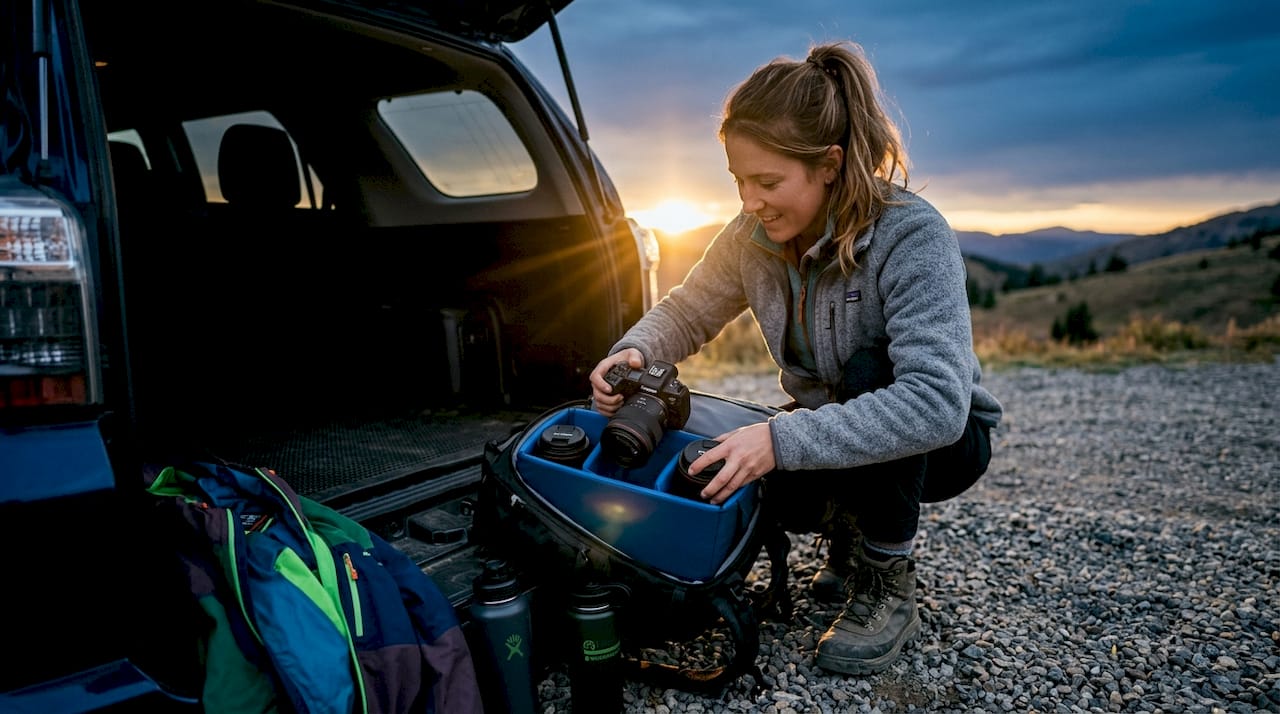
Before you press a single shutter button, you need the right tools in your bag. The goal is not to carry the most gear. It is to carry the right gear, organized so you can access it fast when conditions change.
Professionals prioritize lightweight mirrorless bodies like the Sony Alpha series paired with fast prime and zoom lenses. This combination keeps pack weight manageable on multi-hour approaches without sacrificing autofocus speed or image quality. For lenses, a 70-200mm telephoto zoom covers most action scenarios, while a 16-35mm wide-angle lets you place athletes inside dramatic landscapes.
| Gear Category | Purpose | Why It Matters |
|---|---|---|
| Mirrorless camera body | Speed, weight, autofocus | Faster burst rates and lighter than DSLR equivalents |
| 70-200mm telephoto zoom | Reach subjects from a safe distance | Keeps you out of the action while filling the frame |
| 16-35mm wide-angle lens | Environmental context shots | Shows scale and surroundings for storytelling impact |
| Waterproof housing or covers | Protect gear near water or in rain | One wave or rainstorm can end a shoot permanently |
| Monopod or compact tripod | Stability with long lenses | Sharp images in rugged terrain require a stable base |
| Spare batteries (4 or more) | Cold weather and long days | Battery failure is the most common reason photographers miss shots |
Cold weather deserves special attention. Lithium-ion batteries lose 30 to 50% capacity at very low temperatures, which means four spare batteries is a minimum, not a luxury. Keep one set inside your jacket against your body to maintain warmth, and rotate them in sequence throughout the shoot.
Pro Tip: Pack your camera bag the night before every shoot. Lay out every item against your adventure photography checklist and physically check batteries, memory cards, and lens cleanliness. Discovering a dead battery at the trailhead is a preventable mistake.
Camera settings for sharp action shots
Getting the technical side right is where most aspiring photographers lose confidence. The good news is that a handful of settings handle the majority of situations.
- Set your shutter speed to 1/1000s or faster. Freezing fast-paced action in water sports, mountain biking, or climbing requires this as a baseline. For extremely fast subjects like motocross or kayaking, push to 1/2000s.
- Switch to continuous autofocus (AF-C or AI Servo). This mode tracks moving subjects across the frame rather than locking focus on a static point. Continuous autofocus tracking dramatically increases your keeper rate when subjects move unpredictably.
- Use burst mode aggressively. Most modern mirrorless cameras shoot 10 to 20 frames per second. Holding the shutter through a critical moment gives you multiple frames to choose the peak action from.
- Set ISO to Auto with a ceiling. In bright outdoor conditions, ISO 400 to 800 is usually sufficient. In overcast or shaded terrain, allow Auto ISO to climb to 3200 before you start seeing unacceptable grain.
- Open your aperture to f/2.8 to f/5.6. This lets in more light to support your fast shutter speed and creates subject separation from the background, which adds visual impact.
A note on exposure metering: matrix or evaluative metering works well for most outdoor scenes, but backlit subjects or bright snow can fool the meter. Dial in a stop of exposure compensation when shooting against bright skies or reflective water.
Pro Tip: Learn the panning technique for a different creative effect. Set your shutter to 1/60s to 1/125s, track the athlete smoothly as they move, and fire during the motion. The subject stays sharp while the background blurs into streaks of color, conveying speed in a way that frozen action cannot.
For a deeper breakdown of framing and orientation in dynamic sports, the step-by-step sports photography resource from Bissig covers the full workflow.
90% of outdoor adventure shots are recommended in landscape orientation to capture environment and preserve cropping flexibility. Portrait orientation has its place for editorial use, but landscape should be your default.
Composition and lighting strategies
Technical settings get you a sharp photo. Composition and light make it worth looking at. These two elements are where the types of adventure photos that go viral differ from the ones that sit unseen on a hard drive.
Lighting position is the single biggest variable you control before you shoot. Morning and evening light produces softer, warmer tones that add depth and dimension to faces and landscapes. Position yourself so the sun is behind you and illuminates the subject from the front. Backlighting creates silhouettes, which can be powerful but should be a deliberate choice, not an accident.
- Apply the rule of thirds. Place your subject off-center and leave space in the direction they are moving. This gives the image visual breathing room and implies motion.
- Mix wide shots with close-ups. Wide shots establish the environment and scale. Close-ups capture emotion, sweat, and the wear on gear that tells the real story of effort.
- Shoot from unexpected angles. Get low to the ground for a skateboarder, position yourself above a climber looking down, or shoot through foreground elements like grass or rock to add depth.
- Capture authentic details. Images showing emotion and effort resonate more than purely scenic shots. The grimace of a climber mid-crux, mud-splattered goggles, or a chalk-covered hand on a hold. These details tell the human story.
Pro Tip: Scout your shooting location before the athlete arrives. Walk the terrain, identify where the best light falls, and mark two or three positions that offer different perspectives. Knowing your angles in advance means you react to the athlete instead of scrambling to find your spot.
Understanding outdoor storytelling through photography is a skill that develops over time, but intentional composition practice accelerates it significantly.
Shooting in challenging conditions
Adventure sports happen in places that are hard on both you and your gear. Rain, snow, heat, and altitude all introduce variables that can end a shoot early if you are not prepared.
- Protect lenses from moisture. Use a lens hood to block rain and reduce lens flare. Keep a microfiber cloth in your chest pocket, not buried in your pack, for quick wipes between shots.
- Use a polarizing filter near water. A circular polarizer cuts glare off wet rocks, rivers, and ocean surfaces, restoring color and contrast that would otherwise wash out.
- Manage battery rotation in cold. Keep spare batteries in an inner jacket pocket. Swap them in sequence and never leave a battery in the camera when you are not actively shooting in extreme cold.
- Cover your gear during transitions. Rain covers for camera bags are cheap insurance. A dry bag inside your pack protects hard drives and accessories.
- Watch for condensation when moving between temperatures. Going from a cold exterior into a warm vehicle can cause moisture to form inside your lens. Allow gear to acclimatize slowly inside a sealed bag before opening it.
Understanding how weather shapes your photography outcomes is a skill that separates photographers who consistently deliver from those who get lucky occasionally. Overcast days, while less dramatic, provide even, diffused light that is often ideal for close-up athlete portraits.
“Challenging conditions are not obstacles to great photos. They are the conditions that make great photos possible. Prepare for them, not against them.”
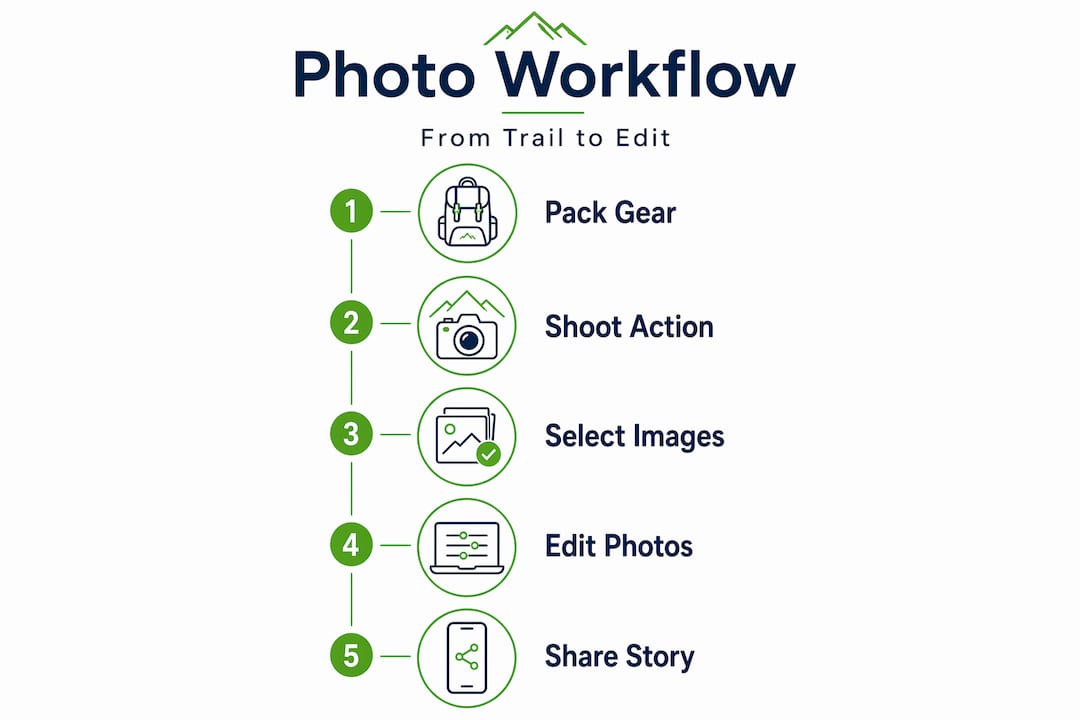
Post-shoot workflow and editing
The shoot is only half the work. What you do with your images afterward determines whether your effort translates into a portfolio that grows your skills and reputation.
Start with organization. Selecting the best shots and editing them with intention enhances storytelling power far more than processing every frame. Import your files immediately after a shoot, back them up to at least two locations, and cull ruthlessly before you open a single image in an editor.
| Editing Software | Best For | Key Advantage |
|---|---|---|
| Adobe Lightroom | Batch editing and portfolio management | Non-destructive editing with strong catalog tools |
| Capture One | Color grading and tethered shooting | Superior color science for skin tones and outdoor hues |
| Luminar Neo | AI-assisted quick edits | Fast results for photographers newer to post-processing |
When editing, focus on four adjustments first: exposure, white balance, contrast, and sharpening. These four corrections fix the majority of issues in raw files. Color grading comes after, and it should serve the mood of the image rather than override it.
- Crop for impact, not just composition. Sometimes the best frame is inside the frame you captured. A tight crop on an athlete’s face during a critical moment can be more powerful than the full scene.
- Build a consistent editing style. Applying a similar tone and color treatment across your portfolio makes your work recognizable. This matters enormously when you start sharing work for editorial or commercial use.
- Export at full resolution for client delivery and at web-optimized sizes for social media. Never share your only copy of an image.
My honest take on what actually makes this work
I have been photographing adventure sports in some genuinely difficult environments, from mountain biking trails in the Alps to remote expedition shoots, and the lesson that took me longest to learn is this: the photographers who consistently produce powerful images are not the ones who shoot the most frames. They are the ones who understand the sport they are photographing.
When you know where a mountain biker is going to land, when you understand the rhythm of a climber moving through a sequence, when you can read the water well enough to anticipate where a kayaker will be in three seconds, your camera becomes secondary. The technical settings matter, but they matter less than positioning yourself correctly before the action begins.
Professional Max Lowe advises slowing down and focusing on authentic moments rather than hunting the perfect shot. That advice sounds counterintuitive in a genre built on speed and adrenaline. But I have found it to be true. The images I am most proud of came from moments of stillness and observation, not from holding down the burst button.
Adventure photography success depends more on presence and storytelling than on location danger or equipment. Your camera does not need to be the most expensive one on the market. You need to be in the right place, at the right time, with enough technical competence to not miss the moment when it arrives.
— Martin
Take your adventure photography further with Bissig
If you are serious about developing your adventure sports photography skills beyond the basics, Bissig offers a body of work and educational resources built on years of commercial and editorial shooting across some of the world’s most demanding environments. Explore outdoor photography styles and techniques to understand the full range of approaches available to you, from documentary to commercial adventure work. For photographers ready to master fast-moving subjects, the dynamic action shots guide breaks down the exact framing, orientation, and camera settings that professional sports photographers use on assignment. Whether you are building a personal portfolio or creating content for a brand, working alongside a professional gives you a benchmark that accelerates your growth faster than any gear upgrade.
FAQ
What is adventure sports photography?
Adventure sports photography is a genre focused on capturing athletes and outdoor enthusiasts in dynamic, often extreme environments. It combines technical camera skills with physical preparedness and storytelling to document sports like climbing, mountain biking, kayaking, and skiing.
What shutter speed should I use for action shots?
Use a shutter speed of 1/1000s or faster to freeze fast-moving subjects in most adventure sports. For extremely high-speed subjects like motocross or downhill racing, 1/2000s gives you more margin to eliminate motion blur.
How many spare batteries do I need for outdoor shoots?
Bring at least four spare batteries for any outdoor adventure shoot, especially in cold conditions. Lithium-ion batteries can lose 30 to 50% of their capacity in low temperatures, so rotating warm batteries from inside your jacket is standard practice.
What camera settings work best in changing outdoor light?
Use Auto ISO with a ceiling of 3200, continuous autofocus, and evaluative metering as your baseline. Dial in exposure compensation of plus or minus one stop when shooting against bright snow, water, or overcast skies to keep exposures accurate.
Do I need expensive gear to start adventure sports photography?
No. A mid-range mirrorless camera body with a versatile 18-200mm zoom lens handles most adventure scenarios effectively. Prioritize learning composition, light reading, and sport-specific positioning before investing in premium glass or bodies.


