
Idea fatigue is real. You’ve shot golden fields, you’ve done the forest path, and now a client is asking for something fresh and you’re staring at a blank mood board. Great outdoor photoshoot ideas aren’t just about picking a pretty location. They require you to think about light, subject interaction, weather behavior, and whether your concept actually serves the story you’re trying to tell. This guide cuts through the noise and gives you a working framework plus a deep list of creative concepts you can adapt immediately, whether you’re shooting portraits, editorial work, or action.
Table of Contents
- Key takeaways
- 1. Understand what makes outdoor photoshoot ideas actually work
- 2. Golden hour field portraits
- 3. Forest edge and dappled light
- 4. Urban architecture and open shade
- 5. Flower fields and seasonal foliage
- 6. Foggy and moody atmosphere shoots
- 7. Rain and umbrella concepts
- 8. Coastal and water-based settings
- 9. Rooftop and elevated urban settings
- 10. Action and movement in natural settings
- 11. Choosing the right approach for your conditions
- What I’ve actually learned from years of outdoor shoots
- Take your outdoor photography further with Bissig
- FAQ
Key takeaways
| Point | Details |
|---|---|
| Light drives everything | Golden hour and open shade are your two most reliable tools for flattering outdoor portraits. |
| Plan backward from light | Scout actual light conditions first, then schedule your client around peak moments. |
| Movement beats posing | Prompting subjects to move produces far more authentic expressions than static posing instructions. |
| Location permits matter | Commercial shoots in public parks can require permits costing $50 to $250 or more. |
| Match concept to conditions | Choosing the right idea for your environment and subject type saves time and produces better results. |
1. Understand what makes outdoor photoshoot ideas actually work
Before you commit to any concept, you need a short checklist running in the background. The best outdoor photoshoot ideas fail when they ignore practical realities. Here’s what to evaluate before you book a location.
Light quality and timing. Golden hour lighting gives you the most flattering natural light for portraits, with the most dramatic quality appearing in the final 15 to 20 minutes before sunset. Arrive 30 to 45 minutes early to work the changing light rather than scrambling to catch it. If you can’t shoot golden hour, open shade is your backup. Open shade provides even, creamy light that eliminates harsh shadows and under-eye dark circles. Position your subject so they face open sky while standing in shade.
Location scouting. Don’t rely on Google Maps screenshots. Walk the location at the same time of day you plan to shoot. Light behaves differently than you expect, and professionals prioritize scouting actual light conditions over theoretical times. Check for distracting backgrounds, foot traffic, and access routes.
Legal permits. Commercial photography permits are required for many public parks and nature sanctuaries. Fees typically range from $50 to $250, and some locations offer annual permits for frequent shooters. Don’t skip this step on paid client work.
Weather adaptability. Overcast days are underrated. Clouds act as a giant diffuser. Rain adds texture and drama. Wind is trickier, but positioning your subject with wind behind them or on the side opposite their hair part controls flyaways. Using burst mode during windy conditions increases your odds of capturing a clean, well-composed frame.
Pro Tip: Schedule your client to arrive 30 minutes before you actually need them. Late arrivals are the single biggest cause of missed golden hour light.
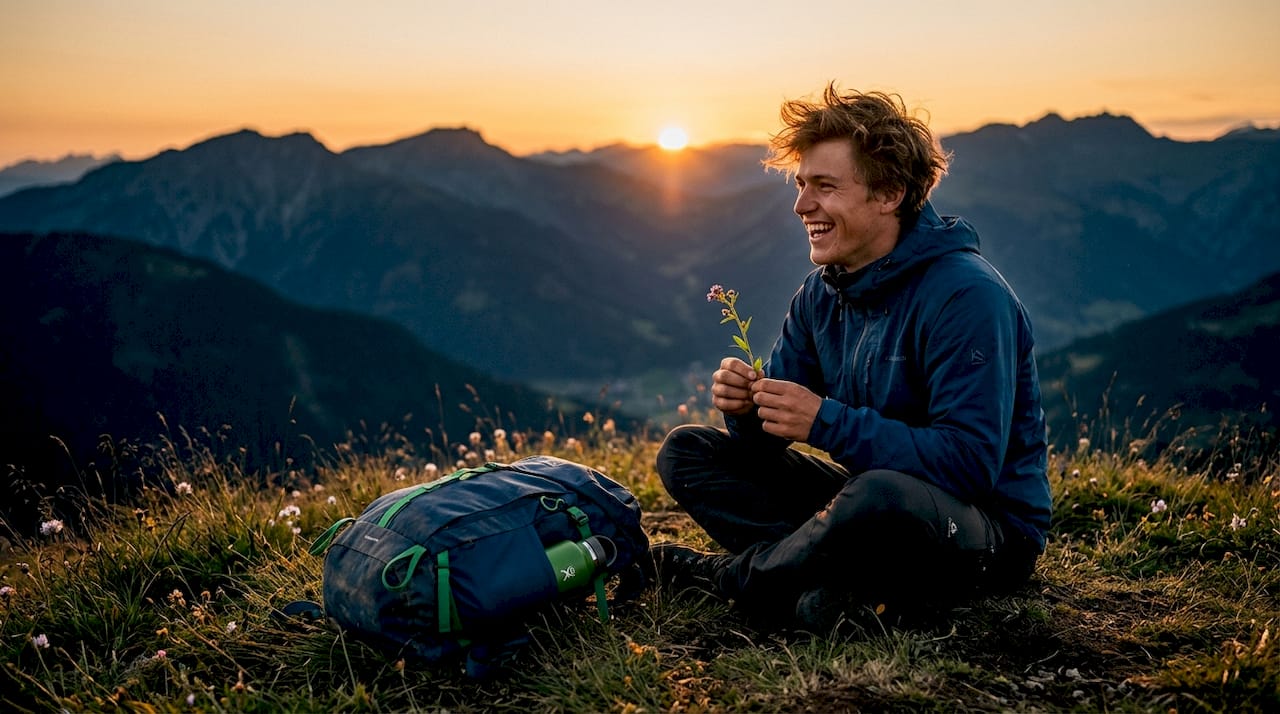
2. Golden hour field portraits
Wide open fields during golden hour are a classic for a reason. The warm backlight creates natural rim lighting around your subject, separating them from the background and adding depth. Face your subject away from the sun and expose for their face. Use a reflector or fill flash to open up the shadows. The backlit portrait technique with a reflector produces flattering results even when direct shade isn’t available.
3. Forest edge and dappled light
The transition zone between dense forest and open meadow gives you two lighting environments within a few steps. Use the open meadow light as your fill source while the tree canopy frames your subject. Dappled light through leaves creates a painterly quality, but watch for hot spots landing directly on faces. Slightly overcast days work better here than full sun.
4. Urban architecture and open shade
Cities are full of outdoor photography opportunities that most portrait photographers overlook. Building overhangs, covered walkways, and north-facing alleys create open shade with a clean, directional quality. Use architectural lines to frame your subject. Reflective surfaces like glass facades and wet pavement add depth and a second light source without any gear.
Pro Tip: Shoot in the direction away from the sun in urban environments. You get the soft ambient light of the sky as your key light and the city as your background, with no harsh shadows.
5. Flower fields and seasonal foliage
Wildflower fields, lavender rows, and autumn foliage all offer built-in color palettes that do half the creative work for you. Shoot low to use the flowers as foreground framing. Encourage your subject to interact with the environment physically. Touching petals, looking down at the ground, walking through the field. Movement prompts produce far more relaxed expressions than asking someone to stand still and smile.
6. Foggy and moody atmosphere shoots
Fog is one of the most underused weather conditions in portrait photography. It compresses the background, removes distracting detail, and creates a cinematic, atmospheric quality that’s nearly impossible to replicate in post-processing. Early morning fog in valleys or near water is your best opportunity. Expose slightly brighter than your meter suggests to keep the fog white rather than gray.
Weather shapes your images in ways no gear can replicate. Understanding how weather affects outdoor shoots gives you a creative edge over photographers who only shoot in perfect conditions.
7. Rain and umbrella concepts
Rain photography requires a weather-sealed camera and a plan. Clear umbrellas are the most versatile prop because they don’t block light or obscure your subject’s face. Shoot on wet pavement to capture reflections. Use a slightly longer lens (85mm to 135mm) to keep yourself dry while maintaining compression. The mood you get from rain is impossible to fake, and most photographers avoid it entirely, which means your images will stand out.
8. Coastal and water-based settings
Water creates natural reflectors and adds movement to otherwise static scenes. Beaches at golden hour give you a wide, uncluttered background with warm light bouncing off the sand. Shoot during low tide for wet sand reflections. River banks and lakesides offer similar benefits with more intimate framing options. Be aware of wind off the water. It’s almost always stronger than inland locations.
9. Rooftop and elevated urban settings
Rooftops give you a clean sky background, which acts as a giant softbox during golden hour or overcast conditions. The height removes street-level distractions and gives your images a sense of scale. Check access permissions before you commit. Many building owners will grant access for a small fee or simply by asking.
10. Action and movement in natural settings
If you’re working with athletes, dancers, or any subject comfortable with physical movement, build your concept around that energy. Action photography outdoors requires faster shutter speeds and continuous autofocus, but the payoff is images with genuine dynamism. Use natural terrain. Rocks, trails, and slopes all add context and visual interest that a flat field can’t provide.
11. Choosing the right approach for your conditions
Not every idea works in every situation. Here’s a direct comparison to help you match concept to conditions.
| Concept | Best light condition | Gear needed | Subject type | Difficulty |
|---|---|---|---|---|
| Golden hour field | Clear sky, 60 min before sunset | Reflector or fill flash | Any | Low |
| Forest edge | Overcast or partial cloud | Standard kit | Relaxed subjects | Medium |
| Urban open shade | Any time of day | Minimal | Any | Low |
| Fog/moody atmosphere | Early morning, overcast | Weather-sealed body | Experienced subjects | Medium |
| Rain and umbrella | Active rain | Weather-sealed body, clear umbrella | Confident subjects | High |
| Coastal/water | Golden hour or overcast | Lens hood, UV filter | Any | Medium |
| Action in terrain | Bright, even light | Fast lens, continuous AF | Athletic subjects | High |
The table makes one thing clear. Urban open shade is the most accessible concept regardless of conditions or experience level. Golden hour field work is low difficulty but time-sensitive. Action shoots demand the most technical preparation.
For subjects who are nervous or stiff in front of the camera, start with a low-difficulty concept in open shade and use movement prompts to loosen them up. Continuous burst mode during active movement prompts maximizes your chances of capturing candid, expressive moments. For confident subjects or editorial work, push into the higher-difficulty concepts where the environment itself becomes a character in the image.
What I’ve actually learned from years of outdoor shoots
I’ll be honest: the most common mistake I see photographers make outdoors isn’t a technical one. It’s over-planning the pose and under-planning the light. I’ve watched photographers spend 20 minutes choreographing a subject’s hand position while the golden hour light fades behind them. The image they were obsessing over never happened.
What actually works is showing up early, knowing exactly where the light will be, and then giving your subject something to do rather than a position to hold. Walk toward me. Pick up that rock. Look back over your shoulder. Natural expressions through movement are not a style choice. They’re a technical tool.
I’ve also learned to manage the people around the shoot as carefully as the shoot itself. A well-meaning partner or parent standing behind you giving feedback to your subject will kill the session faster than bad light. Early, confident communication with everyone present about how the session works saves you from that situation entirely.
The other thing nobody talks about enough: simple gear outperforms complex gear outdoors almost every time. A 5-in-1 reflector and a fast 85mm lens will produce better results in the field than a full strobe setup that takes 15 minutes to position and another 10 to pack when the location changes. Adaptability is the skill. Everything else supports it.
— Martin
Take your outdoor photography further with Bissig
If this article gave you a clearer picture of what’s possible outdoors, Bissig’s work goes several layers deeper. Martin Bissig has spent years shooting commercial and editorial work across some of the world’s most demanding outdoor environments, from the Swiss Alps to the mountains of Pakistan. His portfolio demonstrates exactly what happens when technical preparation meets genuine creative vision in the field. Explore the full range of outdoor photography styles and techniques on the site, or take a look at his professional outdoor work to see how these ideas translate at the highest level.
FAQ
What is the best time of day for outdoor photoshoots?
Golden hour, roughly 60 minutes before sunset, provides the most flattering natural light for outdoor portraits. If golden hour isn’t possible, open shade at any time of day delivers soft, even light without harsh shadows.
Do I need a permit for an outdoor photoshoot?
Commercial shoots in public parks and nature areas often require permits, with fees typically ranging from $50 to $250. Always check local regulations before scheduling a paid client session outdoors.
How do I get natural expressions during an outdoor photoshoot?
Use movement-based prompts instead of static posing instructions. Asking subjects to walk, interact with the environment, or look away and back produces far more relaxed and authentic expressions than telling them to stand still.
How do I handle harsh sunlight during an outdoor photoshoot?
Move your subject into open shade where they face open sky for soft, even light. Alternatively, turn them away from the sun and use a reflector or fill flash to open up facial shadows for a flattering backlit portrait.
What outdoor photoshoot ideas work for beginners?
Urban open shade portraits and golden hour field sessions are the most accessible starting points. Both require minimal gear, offer forgiving light conditions, and work well with subjects of any experience level.


