

Organizing travel photography projects means building a repeatable system that covers folder structure, file naming, curation, metadata, and backup before a single image leaves your memory card. Without that system, a two-week trip to Pakistan or California can produce thousands of raw files that sit unsorted for months, killing both creative momentum and commercial usability. The tools that make the biggest difference are GPS metadata tagging, date-location naming conventions, and phased curation workflows. Get those three right, and every trip becomes a searchable, shareable archive rather than a digital pile.
How to organize travel photography projects: tools and systems
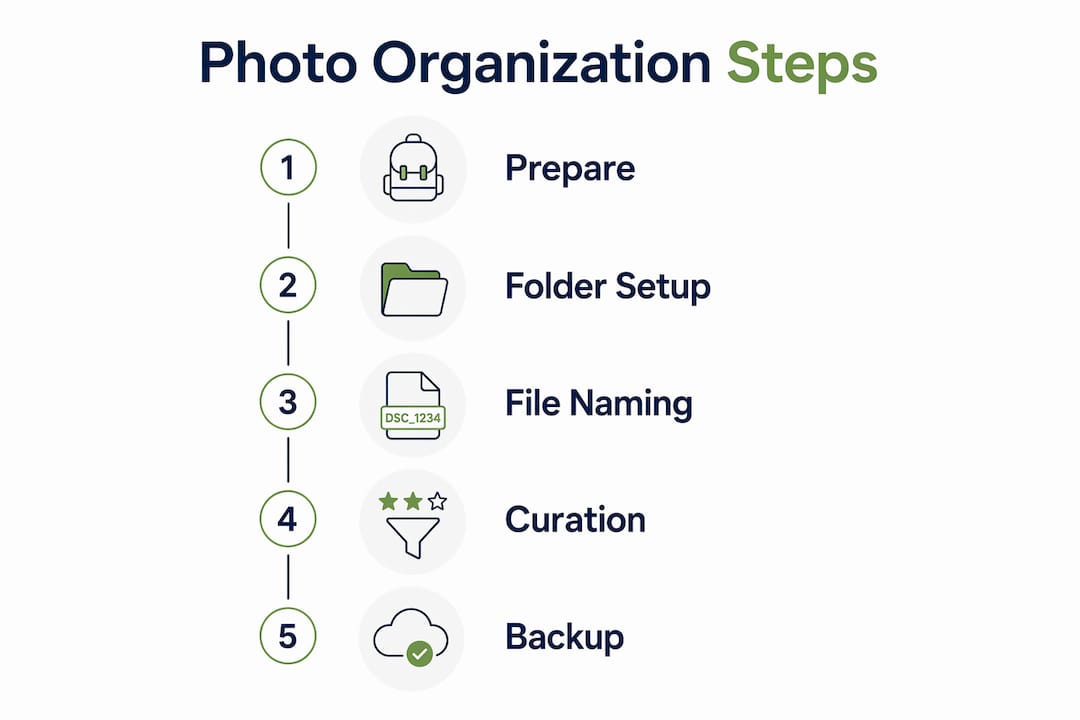
The foundation of any photo organization system is a consistent folder hierarchy. The most practical structure runs three levels deep: year at the top, then trip name or destination, then shoot date. A folder labeled “2026 > Pakistan Karakoram > 20260714 Base Camp” tells you exactly what is inside without opening a single file. That specificity pays off when a magazine editor calls six months later asking for a specific shot.
File naming conventions carry equal weight. A name like “20260714_Karakoram_Canon-R5_0042.CR3” encodes date, location, camera model, and sequence number. GPS metadata embedded in photos combined with file-naming presets allows automated organization by location in standard file managers. That automation eliminates the manual folder creation that most photographers dread after a long trip.
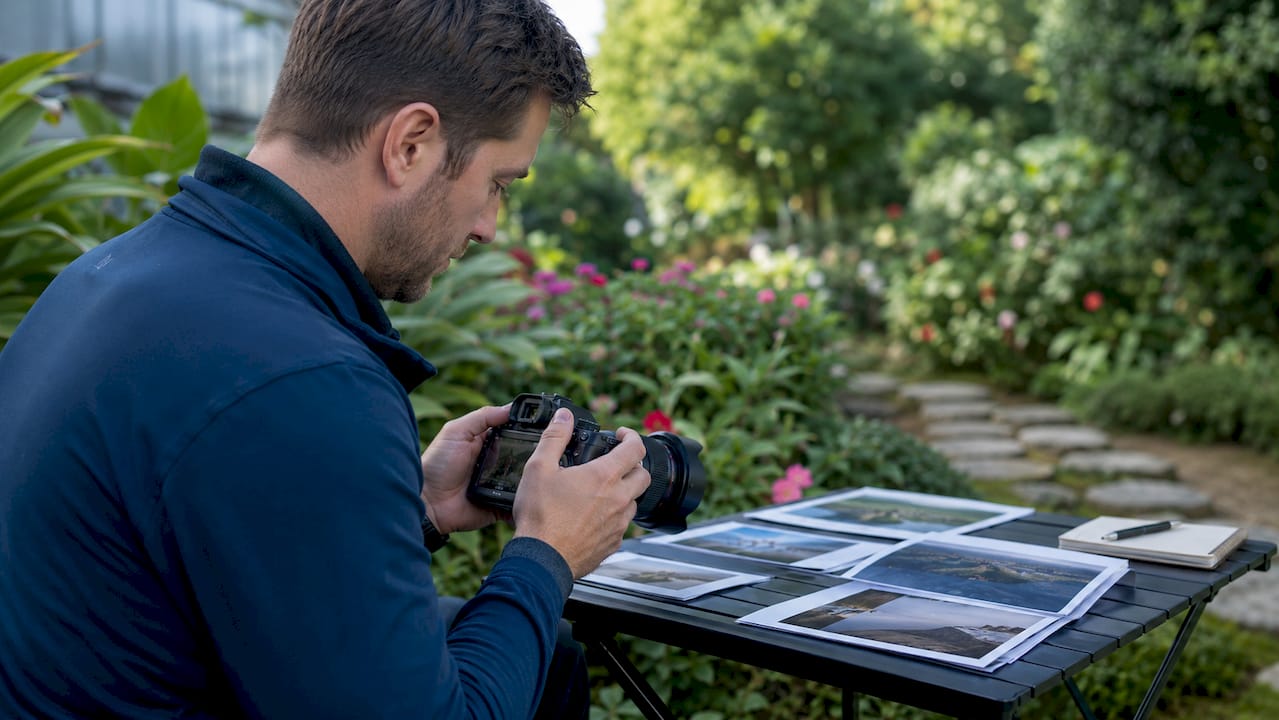
Tools like DockBuddy Organizer read GPS coordinates directly from EXIF data and sort images into location-based folders automatically. For cloud storage, Google Photos and iCloud both read location metadata and create automatic albums. Neither replaces a deliberate folder structure, but both serve as fast search layers on top of it.
| Tool | Best for | Key strength | Limitation |
|---|---|---|---|
| DockBuddy Organizer | GPS-based auto-sorting | Reads EXIF location data | Requires GPS-enabled camera or phone |
| Google Photos | Cloud search and sharing | Face and location recognition | Compressed storage on free tier |
| iCloud Photos | Apple ecosystem sync | Seamless device sync | Limited cross-platform access |
| External hard drive | Offline archival backup | No subscription cost | Physical damage risk |
| Lightroom Classic | Full DAM workflow | Catalog, edit, export in one | Steep learning curve |
Pro Tip: Name your folders before you leave for a trip. Create the year and destination folders on your laptop the night before departure. When you import cards each evening, you drop files into a folder that already exists rather than creating structure while exhausted.
How can photographers efficiently curate highlight photos?
Curation is where most photographers lose hours. The fix is a phased approach that breaks the task into three distinct passes rather than one overwhelming session.
- Purge junk first. Delete blurry shots, accidental frames, and exact duplicates in one fast pass. Do not evaluate composition yet. Just remove the obvious failures.
- Cluster similar shots. Group burst sequences and bracket sets. From each cluster, pick one to three keepers based on sharpness, expression, and light. Sorting by clusters and picking 1–3 keepers reduces clutter without requiring deep creative judgment at this stage.
- Select highlights and favorites. From the surviving images, flag your highlights. A well-organized trip collection should aim for 30–80 highlight shots and 10–30 favorites per trip. Those numbers force real editorial decisions and make the collection immediately shareable.
The entire phased curation process takes roughly 30 minutes for a typical trip collection when you follow the three-pass method. That is a realistic commitment, not an optimistic estimate.
Curation criteria split into two categories: technical and emotional. Technical criteria include sharpness, exposure, and clean backgrounds. Emotional criteria ask whether the image makes a viewer feel the location. National Geographic photographers consistently prioritize narrative over technical perfection, and that standard applies directly to which shots earn a highlight flag.
Curate incrementally during the trip rather than waiting until you are home. Spend 20 minutes each evening reviewing that day’s cards. You remember the context of each shot while it is fresh, which makes selection faster and more accurate.
Pro Tip: Use your camera’s in-camera rating system to mark strong shots on the spot. Most Canon and Sony bodies support star ratings that transfer directly into Lightroom Classic on import, giving you a pre-sorted starting point before you even sit at a desk.
What are effective ways to add context and metadata to travel photos?
Metadata is the difference between a photo you can find in three years and one that is lost in a folder called “Misc 2024.” Adding context at the project level takes less time than most photographers expect and pays back every time you search, pitch, or share.
The most useful metadata fields are:
- Caption: One sentence describing what is happening and where. “Mountain biker descending the Karakoram Highway above Gilgit, Pakistan, july 2026.”
- Location fields: City, state or region, and country. These power search in Lightroom Classic, Google Photos, and Apple Photos.
- People tags: Name the subjects when relevant. Editorial clients and stock agencies require this for model-released images.
- Keywords: Use broad terms (mountain biking, Pakistan, adventure) plus specific ones (Karakoram Highway, Gilgit-Baltistan). Broad tags aid discovery; specific tags aid retrieval.
Apps like TripMemo combine photo journaling with captioning, letting you attach notes to images directly from your phone while the memory is still fresh. That context is nearly impossible to reconstruct six months later from a raw file alone.
Compelling travel photos tell a story by focusing on context and surroundings rather than just the subject. Your metadata should reflect that same storytelling logic. A caption that reads “Rider on trail” misses the opportunity. “Local rider on a hand-cut singletrack above the Hunza Valley, 3,200 meters” gives an editor everything they need to write a caption without calling you.
For long-term archiving, organize by theme and location rather than purely by date. A folder called “Mountain Biking > Pakistan” retrieves faster for a specific pitch than “2026 > July > Trip 3.” Thematic organization also lets you build a photography portfolio that groups your strongest work by subject rather than by calendar year.
How to maintain and back up your organized photo library
A single backup is not a backup. It is a copy. The difference matters when a hard drive fails or a laptop gets stolen at an airport.
The professional standard for protecting irreplaceable travel photos includes:
- Active cloud sync: Google Photos, iCloud, or Amazon Photos running automatically whenever you connect to Wi-Fi. This protects against physical device loss.
- Local external drive: A dedicated drive that mirrors your full library. Keep it at home or in a separate bag from your laptop.
- Geographically separated copy: Cloud sync plus at least one offline backup in a different location prevents catastrophic data loss from fire, flood, or theft.
“The question is not whether you will lose a drive. The question is whether you will have a backup when it happens.” This is the mindset every working photographer needs before leaving for a remote expedition.
Schedule a monthly library review. Delete test shots and near-duplicates that survived the initial curation. Confirm that your cloud sync is current. Check that your external drive has been updated. These three checks take under 15 minutes and prevent the slow accumulation of digital clutter that makes libraries unsearchable over time.
For photographers shooting in remote locations like the Karakoram or Patagonia, carry two memory cards and rotate them. Copy each day’s shoot to your laptop and to a portable SSD before erasing any card. That field workflow means you always have three copies of fresh images before you sleep.
What common organization mistakes should travel photographers avoid?
Most organization problems trace back to a small set of repeatable errors. Recognizing them before a trip is faster than fixing them after.
- Organizing the entire trip in one sitting. Decision fatigue sets in after 45 minutes of image review. Break the work into daily or weekly sessions instead.
- Relying only on date-based folders. Dates tell you when. They do not tell you what. A folder named “20260714” requires you to open it to know the content. Add location and subject to every folder name.
- Skipping pre-trip research. Platforms like Google and 500px improve shot planning, gear prep, and cultural readiness before you arrive. Photographers who research locations in advance shoot more efficiently and return with stronger selects.
- Using generic album names. “Trip Photos” or “Summer 2026” are useless for retrieval. Name albums with destination and subject: “Iceland Waterfalls” or “California Coast MTB.”
- Accumulating uncurated images indefinitely. An unreviewed library grows faster than you can manage it. Set a rule: no new trip gets imported until the previous trip is curated to the highlight stage.
Pro Tip: Create a one-page trip brief before every project. List the locations, the key shots you want, and the gear you are bringing. That document becomes your import checklist and your first folder structure draft before you leave home.
Key takeaways
Organizing travel photography projects requires a consistent folder system, phased curation, rich metadata, and at least two geographically separated backups to protect and retrieve your work efficiently.
| Point | Details |
|---|---|
| Build folder structure before the trip | Create year, destination, and date folders before departure to speed up daily imports. |
| Curate in three passes | Purge junk, cluster similar shots, then select 30–80 highlights and 10–30 favorites per trip. |
| Add metadata at the source | Caption, location, and keyword fields make images searchable and commercially usable years later. |
| Use thematic organization for archives | Sort long-term libraries by theme and location, not just date, for faster retrieval and better pitching. |
| Maintain at least two backups | Keep one cloud copy and one offline copy in a separate location to prevent irreversible data loss. |
What I have learned from organizing hundreds of travel shoots
The biggest shift in my own workflow came when I stopped treating organization as something I did after a trip and started treating it as part of the shoot itself. On expeditions to Pakistan, I spend 20 minutes each evening reviewing cards, flagging strong shots, and dropping files into pre-built folders. By the time I land back in Switzerland, the curation is 70% done.
Pre-trip research changed my results more than any gear upgrade. Studying a location on 500px and Google Earth before I arrive means I already know the light angles, the access points, and the cultural context. That preparation shows up directly in the quality of the selects and in how quickly I can build a coherent story from the images.
The creative principle I keep coming back to is the Moment Triangle: right light, strong composition, authentic story. When I organize a project, I use those three criteria to decide which shots earn a highlight flag. Technical sharpness matters, but a slightly soft frame that captures a genuine moment beats a technically perfect frame with nothing to say. Organization should serve that creative standard, not replace it.
The photographers I see struggle most are the ones who treat their library as a storage problem rather than a storytelling resource. Your archive is your creative capital. Protect it, structure it, and make it retrievable. That is the work that separates photographers who pitch successfully from those who cannot find the shot when an editor calls.
— Martin
Explore professional travel and outdoor photography with Bissig
Bissig brings the same structured, story-driven approach to every outdoor and travel photography project, from mountain biking expeditions in the Karakoram to commercial shoots across Europe. If you want to see how a professional outdoor photography workflow translates into commercially usable images, the Bissig portfolio covers techniques, project examples, and booking options in detail. Whether you are building your own skills or looking for a photographer who delivers organized, pitch-ready image libraries, Bissig’s work as a Canon ambassador and editorial contributor offers a direct model to follow. Explore the full range of outdoor photography services and resources at bissig.ch.
FAQ
How many photos should I keep from a travel trip?
A well-organized travel collection should contain 30–80 highlight shots and 10–30 favorites per trip. Those limits force real editorial decisions and make the collection easy to share with clients or family.
What is the best folder structure for travel photos?
Organize by year, then destination, then shoot date. Adding location and subject to folder names makes retrieval faster than date-only structures, especially across multiple trips.
How do I add GPS location data to my travel photos automatically?
GPS metadata combined with naming presets allows automated sorting by location in standard file managers. Tools like DockBuddy Organizer read EXIF coordinates and create location-based folders without manual input.
How many backup copies do I need for travel photos?
You need at least two copies: one active cloud sync and one offline drive stored in a separate location. Multi-layered backup protects against both physical loss and cloud service failures.
Should I organize travel photos by date or by theme?
Thematic and location-based organization outperforms pure date sorting for long-term archives. Date folders tell you when a photo was taken. Theme folders tell you what it shows, which is what matters when you are pitching or searching years later.


