

You line up the shot, press the shutter, and get a blurry mess of motion where the athlete’s peak moment should be frozen in time. It happens to almost every photographer who steps into sports photography without a clear system. The good news is that consistently capturing crisp, impactful action shots is not about luck or owning the most expensive camera body on the market. It is about following a repeatable process from preparation to final image review. This guide breaks that process down into practical, actionable steps so you can walk onto any field, trail, or court with confidence.
Table of Contents
- Essential tools and preparation
- Step-by-step camera settings for action
- Mastering autofocus and tracking
- Handling low-light and indoor sports photography
- Panning vs freezing: Creative choices in sports photography
- The uncomfortable truth: Why keeper rates matter more than gear
- Take your sports photography further: Expert resources & support
- Frequently asked questions
Key Takeaways
| Point | Details |
|---|---|
| Preparation is key | Understanding the sport and scouting for light give you the best position to capture peak action shots. |
| Fast settings freeze motion | Using fast shutter speeds, wide apertures, and the right ISO ensures sharp sports images. |
| Focus modes matter | Continuous autofocus and custom focus points reduce the risk of blurry, missed moments. |
| Adapt indoors | Increase ISO, set custom white balance, and use fast lenses for clear shots in indoor sports. |
| Creativity makes you stand out | Panning for motion blur or freezing action with fast shutter speeds expands storytelling options. |
Essential tools and preparation
Starting with preparation, let’s clarify what you need before stepping onto the field. Rushing to a sports event with the wrong gear or zero knowledge of the action is the fastest way to miss every significant moment. Good sports photography starts long before you raise the camera to your eye.
Camera body and lens choices
For fast-moving sports, you need a DSLR or mirrorless camera with a fast burst rate, ideally 8 frames per second or higher. Your lens choice matters just as much. A fast telephoto lens, typically 70-200mm f/2.8, gives you reach and light-gathering ability. Prime lenses like a 300mm f/4 or 400mm f/5.6 also work well for sports with predictable movement zones. Always carry extra batteries and multiple high-speed memory cards. Running out of storage during the climax of a race or game is avoidable and embarrassing.
| Gear item | Recommended spec | Why it matters |
|---|---|---|
| Camera body | 8+ fps burst, fast AF processor | Captures peak moments in sequences |
| Telephoto lens | 70-200mm f/2.8 or 100-400mm | Reach + wide aperture for low light |
| Memory cards | V60 or V90 UHS-II rated | Keeps up with high-speed burst shooting |
| Extra batteries | 2 to 3 fully charged | No interruptions during critical action |
Know the sport before you shoot it
Understanding what you are photographing is not optional. Anticipating peak action moments like ball contact, jumps, or finish line crossings, scouting the venue for best positions, and arriving early to pre-focus on key areas will separate your images from snapshots. Study the rules. Know when a sprinter accelerates out of the blocks, or when a mountain biker hits the lip of a jump. That knowledge tells you where to point your camera and when to press the shutter before the moment happens.
Venue scouting and light direction
Arrive at least 30 to 60 minutes early. Walk the venue perimeter and identify where the peak action happens most often. Pay attention to light direction. Is the sun at your back when you stand at a specific corner? Does a shaded section of the field create flat, dull images? Position yourself where the light hits the athlete’s face, not their back. Check local weather apps for cloud cover forecasts because overcast conditions produce softer, more even light that is often easier to work with than harsh direct sun.
- Scout two or three potential shooting positions before committing
- Mark where goalkeepers, finish lines, or jump ramps are located
- Note where shadows fall during warm-up time
- Identify any obstructions like fences, marshals, or media zones
Pro Tip: Before leaving home, clean your lens glass, check your camera sensor for dust spots, and format your memory cards. Five minutes of kit maintenance prevents ruined shots from smudges or corrupted files.
For a deeper breakdown of how to approach all phases of outdoor shooting, the complete outdoor action guide covers everything from trail running to mountain biking in one structured resource. You can also explore how shooting with context and intention connects to the broader outdoor storytelling role that defines great sports imagery.
Step-by-step camera settings for action
With your gear and location dialed in, the next step is configuring your camera for optimal performance. Wrong settings erase all your preparation work instantly. Let’s make sure your camera is working with you, not against you.
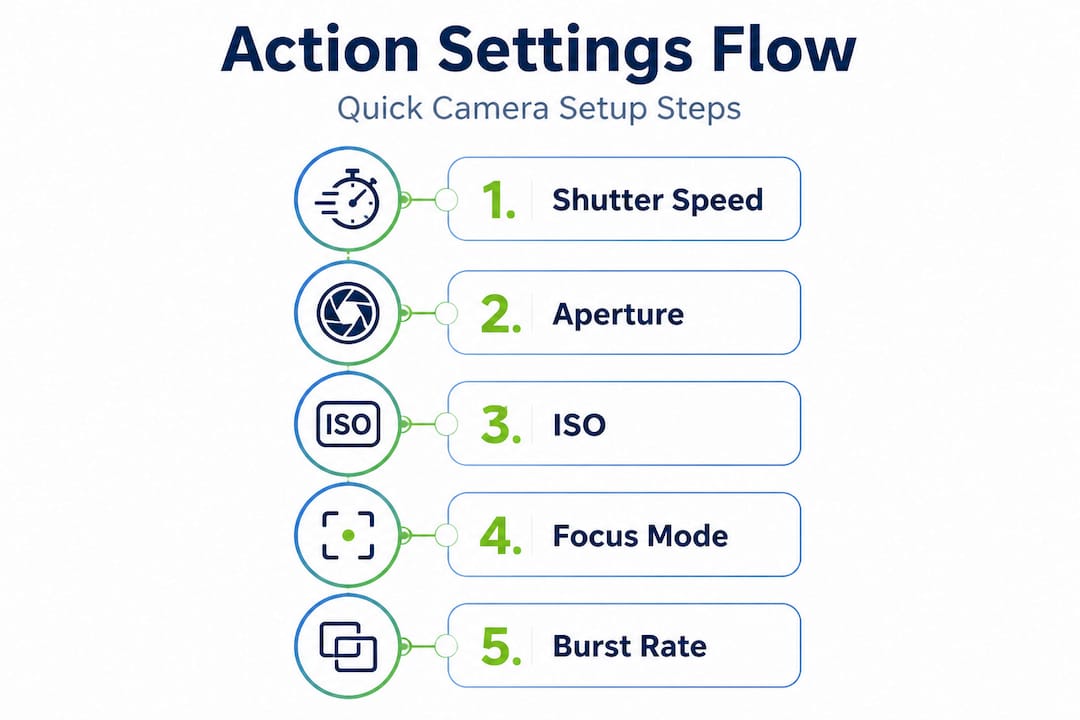
Shutter speed is everything
Minimum shutter 1/1000s is your starting baseline, with 1/2000s or faster for explosive sports like tennis, basketball, or motocross. A slower shutter causes motion blur that no amount of editing will fix. In Shutter Priority mode, you set the shutter speed and let the camera handle aperture automatically. This works well for beginners in consistent light. Manual mode with Auto ISO gives experienced photographers control over depth of field while the camera adjusts sensitivity to exposure conditions.
| Sport type | Recommended shutter | Aperture | ISO ceiling |
|---|---|---|---|
| Running / cycling | 1/1000s to 1/1600s | f/4 to f/5.6 | 3200 |
| Basketball / tennis | 1/2000s to 1/3200s | f/2.8 to f/4 | 6400 |
| Mountain biking (outdoor) | 1/1600s to 1/2500s | f/4 | 1600 |
| Indoor handball | 1/1000s min | f/2.8 | 12800 |
Step-by-step camera configuration for fast action
- Set your mode dial to Shutter Priority (Tv/S) or Manual (M)
- Choose a shutter speed of at least 1/1000s for most outdoor sports
- Set aperture to f/2.8 or f/4 to allow maximum light and isolate athletes from busy backgrounds
- Enable Auto ISO with a ceiling between 6400 and 12800 depending on your camera’s noise performance
- Turn on your camera’s high-speed burst mode
- Enable electronic first curtain shutter if your camera offers it, as it reduces vibration during burst shooting
Pro Tip: Set a minimum shutter speed and pair it with the widest aperture your lens allows. This combination freezes motion while keeping backgrounds soft and athletes visually isolated, which is exactly what editorial clients look for in sharper action shots.
The same technical discipline that makes a still image sharp applies when you transition to video work. For anyone interested in moving images, dynamic action videography and adventure sports videography follow many of the same exposure principles with additional considerations for frame rate and codec choice.
Mastering autofocus and tracking
Once your camera settings are ready, learning to use autofocus efficiently will elevate your results dramatically. Even with perfect exposure settings, a camera that cannot lock focus on a moving athlete will produce blurry, unusable images.
Continuous autofocus modes explained
Continuous AF, known as AF-C on Nikon and Sony or AI Servo on Canon, continuously adjusts focus as your subject moves. This is non-negotiable for sports. Once you half-press the shutter on a moving subject, the camera keeps recalculating distance frame after frame through the burst sequence.
- Enable AF-C or AI Servo mode on your camera
- Use single point or small dynamic zone AF for precision on a specific athlete
- Expand to a wider zone AF when tracking through obstacles or crowds
- Back-button focus is preferred by many sports photographers since it separates focus from shutter functions
- Track the athlete through your viewfinder or electronic viewfinder, keeping them inside your chosen focus point at all times
Common autofocus mistakes
Full-area autofocus sounds convenient, but it often grabs focus on the nearest object, which may be a fence, a marshal, or a jersey number rather than the athlete’s eyes or face. It creates inconsistent, unpredictable results. Many photographers also forget to set their AF tracking sensitivity. Set it to medium so the camera holds focus on your subject even if another object briefly passes through the frame.
“The best autofocus system in the world still fails if you place your focus point on the wrong part of the frame. Train your eye to keep the athlete’s face or torso centered in your custom focus zone.”
Pro Tip: Avoid full-area autofocus in sports. Use a single point or a small custom zone and practice holding it on a moving subject before your event. Fifteen minutes of practice tracking cyclists or runners in a park will pay dividends on shoot day.
For more structured guidance on building a repeatable outdoor shooting workflow, the step-by-step action guide walks through each phase in detail.
Handling low-light and indoor sports photography
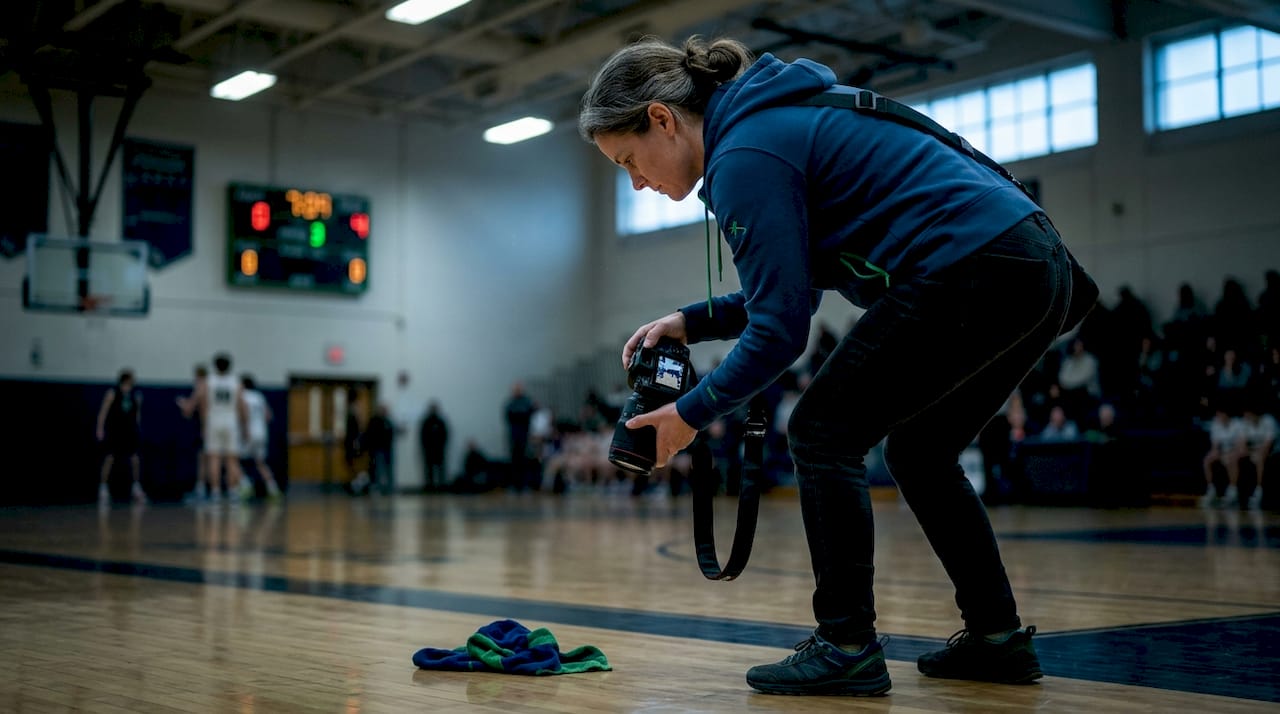
Outdoor action is exciting, but indoor sports present their own set of challenges for photographers. Arenas and gymnasiums are notorious for mixed artificial lighting, low light levels, and unpredictable color casts that can ruin an otherwise technically correct image.
ISO strategy for indoor environments
ISO 3200 to 12800 is the practical working range for most indoor sports. For basketball specifically, a minimum shutter speed of 1/640s is needed to freeze typical movement, and that often requires pushing ISO well above 3200 in dimly lit venues. Modern camera sensors from Canon, Sony, and Nikon handle high ISO surprisingly well. Shooting in RAW format allows you to reduce noise in post-processing without destroying fine detail.
- Set a custom white balance using a gray card or target the specific lighting type like tungsten or fluorescent
- Use a fast f/2.8 prime or zoom lens as the standard choice for indoor work
- Enable noise reduction in your RAW converter rather than in-camera JPEG processing
- Avoid using a pop-up flash. It flattens the image and creates unflattering shadows
Color accuracy in mixed lighting
Indoor arenas often mix sodium vapor, LED panels, and natural light from windows. Auto white balance struggles in these environments and can shift dramatically between frames. Set a custom white balance by photographing a white card under the arena lights at the beginning of your session. This single step saves you from correcting dozens of color-shifted images in post-processing.
Pro Tip: Attach a lens hood even indoors. It reduces stray light from overhead fixtures hitting your front element, which prevents color shifts and flare that you might not notice until you open images on a large monitor later.
The photography workflow steps guide covers how to carry these technical decisions through to consistent editing and delivery, which is especially important when you have thousands of indoor burst images to sort.
Panning vs freezing: Creative choices in sports photography
With technical basics covered, let’s explore how creative approaches can diversify your sports portfolio. Every sports photographer faces a fundamental creative choice at some point: do you freeze motion with a fast shutter, or embrace it with a panning technique?
When to freeze and when to pan
Freezing action prioritizes sharpness and is the approach most photographers learn first and most editorial clients request. Panning creates motion blur in the background while the subject remains relatively sharp, giving a strong sense of speed and energy. It is harder to execute and produces a much lower keeper rate. But when it works, a panning shot of a cyclist or skier can be genuinely stunning.
| Technique | Shutter speed | Best for | Keeper rate |
|---|---|---|---|
| Freeze action | 1/1000s and faster | Most sports, editorial, beginners | Higher (25-40%) |
| Panning | 1/30s to 1/125s | Cycling, running, motorsport, advanced | Lower (5-15%) |
How to execute a basic pan
- Switch to Shutter Priority and choose 1/60s to 1/125s as your starting point
- Track the athlete smoothly before pressing the shutter, matching their speed with your camera movement
- Press the shutter while continuing to follow through, just like a golf swing
- Keep your elbows tucked into your body for stability during the pan
- Review results immediately and adjust shutter speed up or down based on the amount of blur you want
Beginners should prioritize fast shutter speeds and freezing action until they have a solid understanding of autofocus behavior and timing. Panning is a creative tool, not a beginner shortcut. The outdoor photography techniques guide covers both approaches with additional technique examples across different outdoor disciplines.
The uncomfortable truth: Why keeper rates matter more than gear
Here is something most photography content will not tell you directly. Buying a newer camera body will not meaningfully improve your sports photography if your keeper rate is consistently below 10 percent. Keeper rate is the proportion of usable, technically acceptable images compared to the total frames you shoot in a session. Most working sports photographers land between 25 and 40 percent on a well-executed shoot. Beginners often sit closer to 5 to 10 percent, and many blame their gear.
The real issue is almost never the camera. It is timing, autofocus technique, anticipation, and the discipline to critically review your own images after every session. Looking at which shots worked and asking why takes more effort than scrolling through your highlights, but it is the only way to actually improve. Great sports photographers spend serious time in culling and reviewing images, not just shooting.
Most beginners also get paralyzed by gear research. They read forums about sensor performance and autofocus algorithms when they should be out practicing burst shooting on moving subjects. The sports photographer for branding perspective is particularly relevant here: commercial clients hire photographers based on consistent portfolios and reliable delivery, not camera model. Invest the same energy you spend on gear research into reviewing your missed shots and understanding why you missed them.
Take your sports photography further: Expert resources & support
Ready to step up your results? The technical foundation is only the beginning. Building a sustainable sports photography practice means developing a consistent workflow, finding inspiration in expert portfolios, and connecting with resources that match your ambitions.
Explore outdoor photography tips for creative techniques that extend beyond sports into the broader world of outdoor and adventure imagery. If you are based in or near Switzerland, the work and approach of an experienced outdoor photographer Switzerland offers concrete visual inspiration for what is possible across mountain, trail, and competitive sport settings. For those serious about turning their passion into professional results, the photography workflow guide lays out a production-ready system from first shot to final delivery that mirrors how working photographers actually operate.
Frequently asked questions
What is the best shutter speed for sports photography?
For most fast-action sports, use at least 1/1000s; for tennis or basketball, 1/2000s or faster ensures sharp results without motion blur.
How can I avoid blurry sports photos?
Enable continuous AF mode with single or dynamic focus points on the athlete and track them through the viewfinder rather than relying on full-area autofocus.
What ISO should I use indoors or in low light?
Start with ISO 3200 to 12800 paired with a fast f/2.8 lens and a custom white balance to maintain clarity and accurate color in challenging indoor venues.
Should I shoot in Shutter Priority or Manual mode?
Beginners benefit from Shutter Priority for consistent exposures, while experienced photographers use Manual with Auto ISO to control depth of field and adapt quickly to changing light conditions.
What is the keeper rate in sports photography?
Keeper rate is the proportion of usable shots to total images captured in a session, and achieving 25 to 40 percent is considered typical for experienced photographers working fast action sports.
Recommended
- Step-by-step action photography: a complete outdoor guide
- Master action videography: tips for dynamic outdoor footage
- Sharper action shots: professional tips for photography
- What is event photography? A guide for dynamic outdoor events
- Animated photo transformation: bring family memories to life — WonderLens | WonderLens


