
Sports photography is one of the most technically demanding disciplines in the field. You’re chasing fast-moving subjects, dealing with unpredictable light, and competing for position with other photographers, all while trying to capture a single decisive moment that tells a complete story. Mastering sports photography best practices is what separates a blurry, forgettable frame from the kind of shot that ends up on a magazine cover. This guide covers the full workflow, from gear selection and camera settings to positioning, burst shooting, and post-processing, so you can shoot with confidence at any event.
Table of Contents
- Key takeaways
- 1. Sports photography best practices start with the right gear
- 2. Mastering camera settings for sharp, frozen action
- 3. Effective positioning and anticipation strategies
- 4. Burst shooting with intent and managing large image volumes
- 5. Lighting for sports photography
- 6. Framing in sports photography and composition techniques
- 7. Post-processing essentials for professional sports photos
- My honest take on what actually moves the needle
- Take your sports photography further with Bissig
- FAQ
Key takeaways
| Point | Details |
|---|---|
| Shutter speed is non-negotiable | Use at least 1/1000s, and push to 1/1600s or faster for high-speed sports. |
| Positioning beats gear | Strategic placement at action convergence zones consistently produces stronger images than expensive equipment alone. |
| Shoot bursts with intent | Time short bursts around peak moments to keep keeper rates high and culling time low. |
| Manual white balance indoors | Set white balance manually under artificial lighting to prevent color shifts across burst sequences. |
| Back-button focus changes everything | Decoupling focus from the shutter gives you precise control over tracking in chaotic, non-linear action. |
1. Sports photography best practices start with the right gear
Before you can execute any technique, you need equipment that can physically keep up with the sport. That does not mean buying the most expensive body on the market. It means understanding which features actually matter for action capture.
Camera body priorities:
- Fast burst rate: Look for at least 10 frames per second, with 20+ fps on newer mirrorless bodies giving you a real edge in peak-action timing.
- Autofocus system: Subject tracking with eye or body detection is now standard on modern mirrorless cameras and makes a measurable difference in keeper rates.
- ISO performance: A body that holds clean files at ISO 3200 or 6400 lets you maintain shutter speed in low-light venues without sacrificing image quality.
- Buffer depth: A deep buffer means you can sustain burst shooting through a full play or sequence without the camera locking up.
For lenses, telephoto lenses around 70-200mm are the practical workhorses of sports photography, with longer glass useful when you have restricted access or need to compress distance in large venues. A 70-200mm f/2.8 gives you reach, speed, and flexibility across most sports. A 400mm or 600mm prime earns its place at track events, football fields, or any venue where you cannot get close to the action.
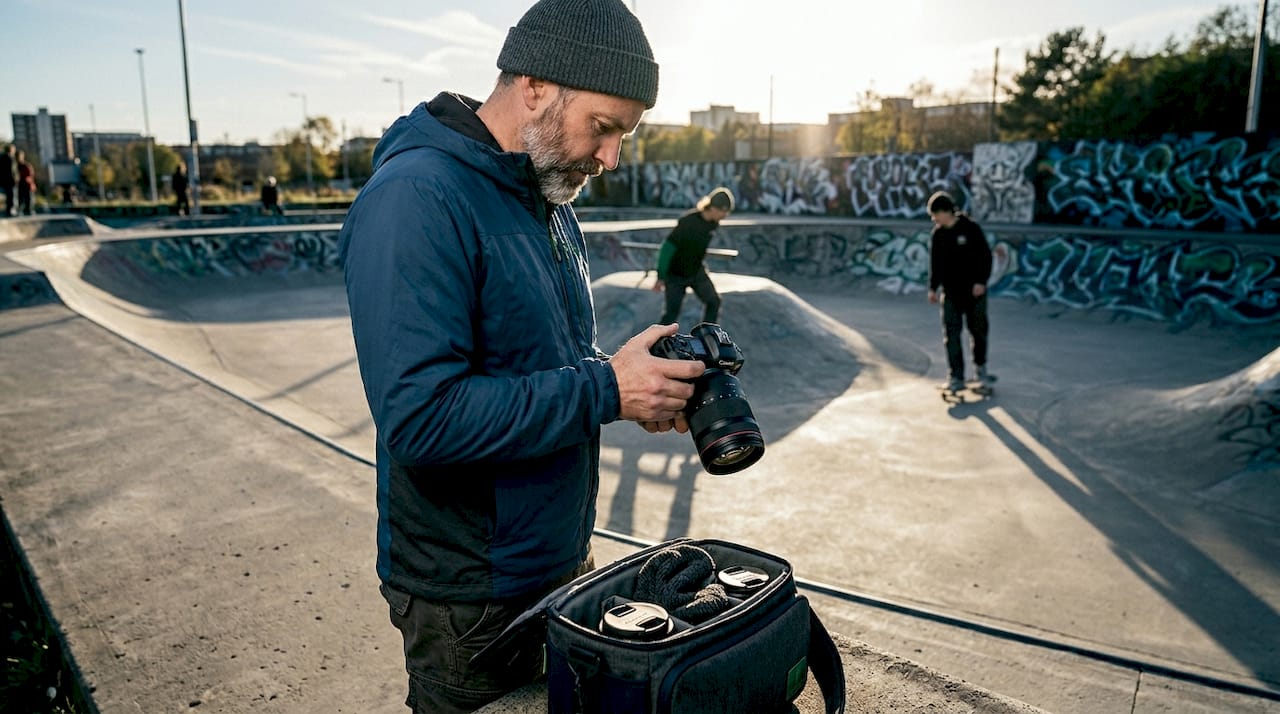
Pro Tip: Bring a monopod instead of a full tripod. It stabilizes your long lens, reduces fatigue during multi-hour events, and lets you reposition quickly when the action shifts.
Accessories matter more than most photographers admit. Pack double the memory cards you think you need, carry at least two fully charged batteries, and bring a rain cover if you are shooting outdoors. An event photography checklist that includes these items will save you from avoidable failures at the worst possible moment.
2. Mastering camera settings for sharp, frozen action
Getting the settings right before the action starts is where most photographers either win or lose the shot. There is no time to adjust mid-play.
Shutter speed is the single most critical variable. A minimum of 1/1000s is the baseline, but for high-speed sports like cycling, motorsport, or basketball, 1/1600s or faster is where you want to be. Anything slower and you risk motion blur on fast limbs or a ball in flight.
Autofocus mode should be set to continuous tracking (AF-C on Nikon/Sony, AI Servo on Canon) for virtually all sports. Back-button focus decouples focus from the shutter release, giving you precise control over when tracking activates. This is especially powerful in chaotic sports where subjects stop, reverse, or cut unpredictably.
ISO and aperture require a balance based on venue conditions:
- Outdoor daylight: ISO 100-400, f/4 to f/5.6, shutter speed 1/1600s or faster.
- Indoor arenas: ISO 1600-6400, widest available aperture (f/2.8 preferred), shutter speed 1/1000s minimum.
- Mixed or changing light: Use Auto ISO with a minimum shutter speed floor set in camera, and review exposure after your first test shots.
Pro Tip: Set your camera to continuous burst mode but think of it as a precision tool, not a safety net. Triggering a burst at the wrong moment still produces a folder full of unusable frames.
For shooting mode, continuous autofocus with back-button focus is the industry standard among professional sports photographers. Single-frame shooting has its place for predictable, slower-paced moments, but for anything dynamic, continuous burst with disciplined trigger timing is the right approach.
3. Effective positioning and anticipation strategies
You can have perfect settings and still miss every great shot if you are standing in the wrong place. Positioning is where experience and preparation pay off more than any piece of gear.
Arriving 60 to 90 minutes early gives you time to walk the venue, identify light sources, test your autofocus on moving subjects, and claim a spot before other photographers arrive. This is not optional for professional work. It is the difference between reactive shooting and intentional shooting.
Where to stand:
- Identify where the action converges. Positioning at action convergence zones, like end zones in football or baselines in basketball, consistently produces stronger images than trying to cover the whole field.
- Consider the light direction. Shooting with the light behind you or at a 45-degree angle to your subject gives you better exposure and catch lights in athletes’ eyes.
- Think about backgrounds. A clean, dark background isolates your subject. A cluttered one competes with it.
- Watch the game flow before you shoot. Understanding which direction play tends to move, which athletes are most active, and where the emotional moments happen (bench reactions, coach interactions) makes you anticipate rather than react.
Pro Tip: Do not plant yourself in one spot for an entire event. Move between quarters, periods, or halves to get different angles and perspectives. Editors love variety, and it makes your final gallery far stronger.
The biggest mistake photographers make at events is waiting for the perfect moment and then missing it because they hesitated. Shoot earlier than you think you need to. You can always delete a frame, but you cannot recreate a moment.
4. Burst shooting with intent and managing large image volumes
Burst mode is one of the most misused tools in sports photography. Holding the shutter down from kickoff to final whistle does not make you a better photographer. It makes your culling workflow a nightmare.
Short bursts of 3 to 5 seconds timed around peak action moments improve your keeper rate and prevent buffer overload. Think of burst mode as a way to capture the exact peak of a jump, tackle, or swing, not as a substitute for timing.
The difference between intentional and indiscriminate burst shooting becomes clear in post-production:
| Approach | Images per event | Estimated keepers | Culling time |
|---|---|---|---|
| Spray and pray | 3,000 to 5,000 | 1 to 2% | 4 to 6 hours |
| Intentional bursts | 800 to 1,200 | 8 to 15% | 45 to 90 minutes |
Managing large volumes of images efficiently is now a real workflow advantage. AI culling software can reduce manual selection time by over 90%, grouping burst sequences and surfacing the sharpest peak-action frames automatically. Tools that score images based on sharpness, composition, and action detection let you move from shoot to delivery in a fraction of the time.
During downtime at an event, use the gaps between plays or periods to do a quick in-camera review. Flagging obvious misses early reduces the pile waiting for you back at the desk.
5. Lighting for sports photography
Lighting is one of the hardest variables to control in sports photography, and one of the most important to understand before you shoot.
Outdoor events in direct sunlight are technically straightforward but visually harsh. Midday sun creates deep shadows under hats and brows. Shooting in the golden hour before sunset gives you warmer, more directional light that adds dimension to athletes’ faces and bodies. If you have any influence over your schedule, early morning or late afternoon sessions produce far more compelling images.
Indoor arenas are a different challenge entirely. Venue lighting is often inconsistent, mixing tungsten, fluorescent, and LED sources that shift color temperature across the frame. Setting your white balance manually, rather than relying on auto, prevents the color shifts that make burst sequences inconsistent and harder to batch-edit in post.
Mixed lighting situations, like a stadium with natural light on one side and artificial light on the other, require you to either commit to one exposure setting and accept variation, or shoot tethered and adjust in real time. Knowing the venue in advance is your best preparation.
6. Framing in sports photography and composition techniques
Strong composition is what separates a technically correct sports photo from one that actually moves people. The rules apply here just as much as in any other genre, with a few sports-specific additions.
Leave room in the frame for motion. If an athlete is running left, give them space on the left side of the frame. Cutting them tight against the edge creates visual tension that works against the sense of movement you are trying to convey. This is one of the most common framing mistakes in sports photography.
Avoid cropping at joints. Cutting a frame at the wrist, knee, or ankle looks unintentional and distracting. Crop at the mid-forearm, mid-thigh, or not at all. This applies both in-camera and during post-processing.
Get low when the sport allows it. Shooting from ground level on a basketball court or at the finish line of a race changes the entire feeling of the image. It makes athletes look powerful and the action more immersive. Explore action photography techniques that use perspective and angle as creative tools, not just technical considerations.
7. Post-processing essentials for professional sports photos
Your editing workflow is where technically solid images become professionally deliverable ones. Speed matters here, especially when clients or editors have tight turnaround windows.
Key editing priorities for sports photos:
- White balance correction: Fix color casts first, especially for indoor shots. A consistent white balance across a burst sequence makes batch editing far faster.
- Sharpness and focus check: Focus on the athlete’s eyes or chest is non-negotiable. Any frame where that sharpness is off does not make the cut, regardless of how good the composition is.
- Noise reduction with masking: At high ISO, apply noise reduction selectively using masking to protect subject edges and fine detail. Blanket noise reduction softens the image and kills the texture that makes sports photos feel real.
- Cropping for composition: Tighten the frame to emphasize motion and remove distracting backgrounds, but never crop at joints.
- Clarity and dehaze tools: Used lightly, these add punch and definition to athletes in motion without making the image look over-processed.
- Color grading: A subtle grade that deepens shadows and lifts midtone contrast adds intensity without looking artificial. Avoid heavy-handed color shifts that distract from the subject.
Pro Tip: Consider converting select images to black and white. Removing color forces the viewer to focus entirely on form, expression, and motion, and it often makes the most emotionally powerful frame in a gallery.
For editing sports photos efficiently, build a Lightroom or Capture One preset that handles your baseline corrections for each venue type. Apply it on import and then fine-tune individually. This alone can cut your editing time in half.
My honest take on what actually moves the needle
I’ve shot sports and action across some demanding environments, from mountain bike races in the Alps to commercial campaigns in remote locations. And the thing I keep coming back to is this: most photographers obsess over gear when they should be obsessing over position.
I’ve seen photographers with entry-level bodies come back with images that outperform what someone with a top-tier setup produced, simply because they found the right angle, understood the sport, and were ready when the moment arrived. Gear matters, but it is not the deciding factor nearly as often as people think.
The other thing I’ve learned is that disciplined culling is a professional skill, not just a chore. Burst mode without intent produces excessive images and slows your entire workflow. When I started timing my bursts more deliberately and culling more aggressively in the field, my delivery speed improved dramatically and my clients noticed the consistency.
On editing: under deadline pressure, get the sharpness and white balance right first. Everything else is secondary. A well-exposed, sharp, correctly white-balanced image with minimal editing will always beat an over-processed one with a creative grade and soft focus.
Back-button focus took me about two weeks to fully internalize. Once it clicked, I never went back. If you have not made the switch yet, block out a practice session specifically for it. It is worth every minute.
— Martin
Take your sports photography further with Bissig
If this article gave you a clearer picture of what professional sports photography actually requires, the next step is putting it into practice with structured guidance. At Bissig, Martin has developed detailed resources drawn directly from his work as a Canon ambassador and professional action photographer. Whether you are working on mastering dynamic action shots or looking to understand the broader context of outdoor photography styles and techniques, there is a clear path forward. For photographers ready to go deeper on capturing sharp, compelling sports images, explore the full range of guides and workshops available at bissig.ch.
FAQ
What shutter speed should I use for sports photography?
Use at least 1/1000s as a baseline, and push to 1/1600s or faster for high-speed sports like cycling or motorsport to fully freeze motion.
What is back-button focus and why does it matter?
Back-button focus separates autofocus activation from the shutter button, giving you more precise tracking control. It is especially useful in chaotic or non-linear sports where subjects change direction unpredictably.
How do I manage thousands of images after a sports event?
Time your bursts deliberately around peak action to reduce total volume, then use AI culling tools to sort and surface the sharpest frames automatically, cutting manual review time by over 90%.
What lens is best for sports photography?
A 70-200mm f/2.8 is the most versatile choice for most sports. Longer telephoto lenses are useful when access is restricted or the venue is very large.
How early should I arrive at a sports event to shoot?
Arrive 60 to 90 minutes early to scout the venue, test your autofocus, identify the best positions, and get set up before the action starts.


