

A solid list of photography equipment for expeditions starts with one non-negotiable truth: gear that fails in the field cannot be replaced by talent. The right kit balances durability, portability, and versatility across every terrain and climate you will face. This guide covers the core categories every outdoor photographer needs, from camera bodies and lenses to protective bags, backup power, and accessories. Whether you are trekking in the Himalayas or shooting mountain bike trails in the Alps like Bissig, the principles stay the same.
1. What are the best camera bodies for expedition photography?
Camera body selection sets the ceiling for everything else in your kit. Weather sealing and durability matter more than megapixel count when you are shooting in dust, rain, or freezing temperatures. A camera that fails at altitude costs you the shot. A camera with a slightly lower resolution sensor that keeps working costs you nothing.
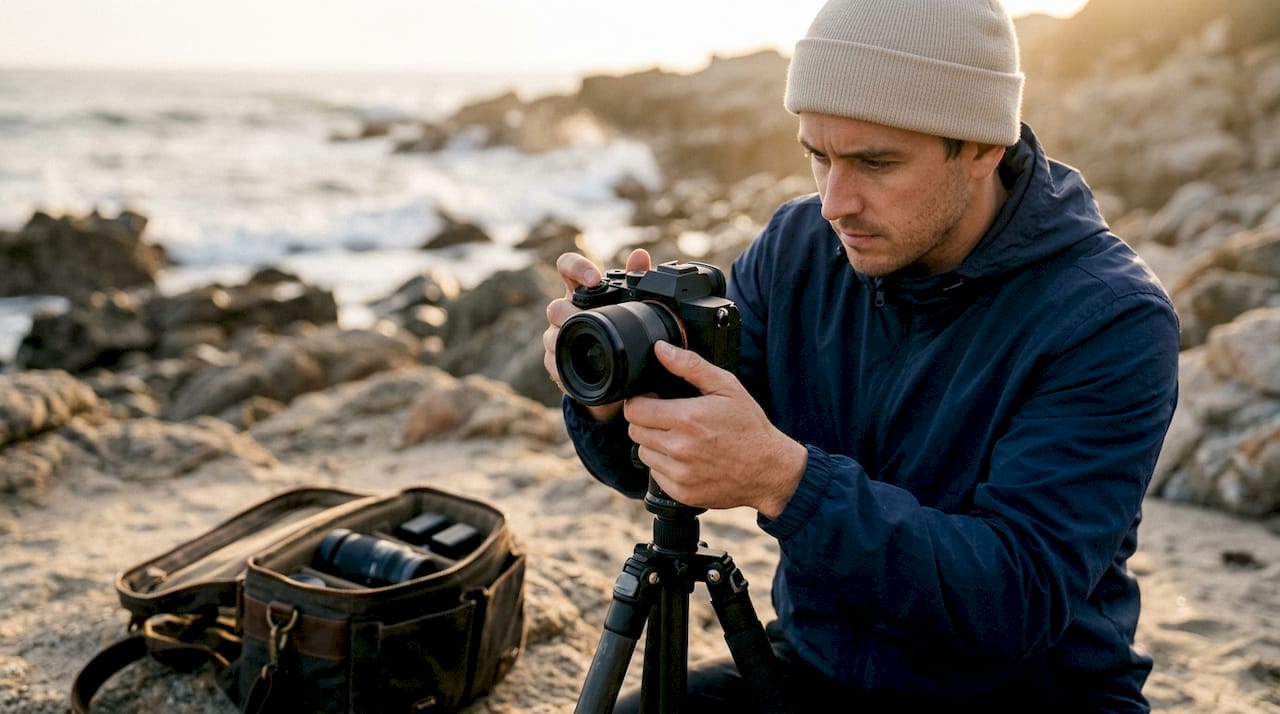
Full-frame mirrorless bodies deliver the best image quality and low-light performance for serious expedition work. The Sony A7C II weighs approximately 514g body-only, making it one of the lightest full-frame options available. That weight advantage compounds over a multi-day trek.
For photographers on tighter budgets or those prioritizing video, the Sony ZV-E10 II offers 4K video and full lens interchangeability at around $750. It accepts the same E-mount lenses as the A7C II, which matters if you carry both bodies.
- Primary body: Full-frame mirrorless with weather sealing
- Secondary body: APS-C or budget mirrorless for backup and lens switching
- Shared lens mount: Reduces the number of adapters and lenses you carry
Pro Tip: Pack two bodies that share the same lens mount. Switching lenses in wind, rain, or cold is slow and risky. Two bodies with different lenses attached means you never expose your sensor to the elements mid-shoot.
2. Which lenses should you bring to cover every scenario?
Three lenses cover nearly every expedition shooting situation: a 16-35mm wide-angle, a 24-70mm standard zoom, and a 70-200mm f/2.8 telephoto. A comprehensive expedition kit built around these three focal lengths handles landscapes, environmental portraits, and wildlife without redundancy. Each lens earns its weight.
Prime vs. zoom for expeditions
Zoom lenses win on expeditions because conditions change faster than you can swap glass. A 24-70mm f/2.8 replaces three or four prime lenses in one slot. Prime lenses offer superior sharpness and wider maximum apertures, but the weight and swap time rarely justify them unless you specialize in one type of shot.
Filters: the underrated force multiplier
Circular polarizers reduce glare on water and deepen blue skies. Neutral density filters let you shoot long exposures in bright alpine light. Both fit in a shirt pocket and cost nothing in weight terms relative to the images they enable.
| Lens | Focal range | Primary use |
|---|---|---|
| Wide-angle zoom | 16–35mm | Landscapes, interiors, tight spaces |
| Standard zoom | 24–70mm | Environmental portraits, general coverage |
| Telephoto zoom | 70–200mm f/2.8 | Wildlife, distant subjects, compression |
Pro Tip: Pack lenses with rear caps facing the bag’s center and front caps facing outward. Proper lens orientation protects the sensitive rear elements and lets you grab and mount a lens in seconds without fumbling.
3. How to choose protective bags and cases for your gear
The bag system you choose determines how well your gear survives transit, how fast you access it in the field, and how much your back suffers over a long day. A single bag cannot do all three jobs well. The solution is a three-bag hybrid system built around different transport modes.
The system works like this. A hard case, such as the Pelican Air 1535, protects gear during checked luggage and vehicle transport. A hiking backpack fitted with internal camera units handles multi-day treks. A small shoulder sling stays accessible during vehicle days or short hikes when you need one camera ready at all times.
Internal camera units, known as ICUs, are padded modular inserts that drop into standard backpacks. They let you convert any quality hiking pack into a camera pack without buying a dedicated photography bag. That flexibility matters when you need to carry food, water, and camping gear alongside your camera kit.
Waterproof protection is mandatory for remote expeditions. Rain, salt spray, river crossings, and condensation all threaten optics and electronics. A waterproof backpack or dry bag liner adds minimal weight and prevents damage that no amount of cleaning can reverse.
- Hard case: Checked luggage, vehicle transport, base camp storage
- Hiking backpack with ICUs: Multi-day trekking with full kit
- Shoulder sling: Quick access during vehicle days or short approaches
- Dry bag liner or waterproof cover: Mandatory for rain, spray, and condensation
4. What accessories and backup gear do you need for extended expeditions?
Accessories separate a photographer who comes home with images from one who comes home with excuses. Power, storage, and cleaning supplies are the three categories that most often fail photographers in the field.
Power management
Carry at least four to six spare camera batteries per body. Cold temperatures drain lithium batteries faster than any other factor. Keep spares in an inner jacket pocket close to your body heat. A dead battery in a Karakoram valley at minus 15 degrees Celsius is not a minor inconvenience. It ends your shoot.
Memory cards and data backup
Use fast UHS-II cards rated for your camera’s burst speed. Carry at least twice the storage you think you need. Back up every evening to a portable SSD. Losing images to a corrupted card on day three of a ten-day expedition is a permanent loss.
Cleaning and moisture control
Include 3–5 silica gel packets per camera bag. Silica gel absorbs moisture that causes fungus on lens elements and corrosion on electrical contacts. Replace packets when they turn from blue to pink. A rocket blower, lens cloths, and sensor swabs round out the cleaning kit.
Pro Tip: Store silica gel packets in a sealed zip-lock bag between uses. They recharge in a standard oven at low heat, which saves money on replacements during long expeditions.
Tripods and stabilizers
A carbon fiber travel tripod weighs under 1.5 kg and handles most landscape and long-exposure work. For video, a compact gimbal stabilizer adds smooth motion to handheld footage without the bulk of a full-size rig. If aerial shots are part of your plan, a drone with at least three batteries rounds out the kit. A full vehicle-supported expedition kit including a drone, tripod, and all accessories typically weighs around 10.6 kg total.
5. How to tailor your gear list based on expedition type
Not every expedition calls for the same photography gear for adventures. The right outdoor photography gear checklist depends on how you travel, how far you walk, and what you are shooting.
Vehicle-supported expeditions
Vehicle support removes weight limits from the equation. You can carry the full three-lens kit, a full-size tripod, a drone, and a hard case. This setup suits commercial shoots, multi-day overland trips, and any expedition where a vehicle stays close to camp.
- Two camera bodies with shared lens mount
- Three-lens zoom kit (16-35mm, 24-70mm, 70-200mm)
- Full-size carbon tripod
- Drone with three batteries
- Hard case for base camp storage
- Full cleaning and backup kit
Trekking expeditions
Weight becomes the primary constraint when you carry everything on your back. Drop to one body and two lenses. A 16-35mm and a 24-70mm cover most situations. Swap the full-size tripod for a compact travel version.
Fast-and-light expeditions
Smartphones serve as capable secondary cameras for fast-and-light missions. National Geographic-affiliated expedition leaders use them extensively for quick shots and social sharing. One mirrorless body, one versatile zoom, and a smartphone covers a surprising range of scenarios at a fraction of the weight.
Prioritize weather sealing over sensor specs regardless of expedition type. A sealed body in a downpour keeps shooting. An unsealed body with a larger sensor does not. You can also check resources on 360-degree photo techniques if immersive documentation is part of your expedition goals.
For deeper guidance on building a complete mountain expedition kit, Bissig’s site covers vehicle-supported and trekking setups in detail.
Key Takeaways
A complete expedition photography kit prioritizes weather-sealed bodies, a three-lens zoom system, a hybrid bag setup, and redundant power and storage above all else.
| Point | Details |
|---|---|
| Camera body selection | Choose weather-sealed mirrorless bodies; two bodies sharing one lens mount cuts swap time and risk. |
| Lens system | A 16-35mm, 24-70mm, and 70-200mm f/2.8 cover every expedition scenario without redundancy. |
| Hybrid bag system | Use a hard case, hiking backpack with ICUs, and a sling bag for transit, trekking, and quick access. |
| Backup power and storage | Carry 4–6 spare batteries per body and back up daily to a portable SSD; silica gel protects optics. |
| Tailor kit to expedition type | Vehicle-supported trips carry full kits; trekking and fast-and-light missions demand ruthless weight cuts. |
What I have learned packing gear for real expeditions
The single habit that changed my field efficiency most was storing the primary camera lens-down with the most-used lens attached. It sounds minor until you are standing on a ridge in a 40-knot wind trying to get a shot before the light dies. One-handed deployment from a lens-down position is genuinely faster and more stable than any other carry method I have tested.
The hybrid bag system took me longer to adopt than it should have. I resisted carrying three bags for years because it felt excessive. Then I did a shoot in Pakistan that involved a flight, a four-hour vehicle transfer, a two-day trek, and daily shooting from a fixed camp. Each bag handled one phase perfectly. The hard case absorbed the baggage handler abuse. The backpack with ICUs distributed weight correctly over the trek. The sling kept one camera ready at camp without unpacking everything.
Cold-weather battery management is the lesson most photographers learn the hard way. I now keep two batteries in my jacket at all times when temperatures drop below freezing. The performance difference between a warm battery and a cold one is not marginal. It is the difference between 300 shots and 80 shots on the same charge.
Smartphones deserve more credit than most serious photographers give them. I use mine for behind-the-scenes documentation, quick social content, and scouting compositions before committing the main camera. They do not replace a mirrorless body for final deliverables, but they lighten the mental load of feeling like every moment needs the big camera. For travel photography tips on using minimal gear effectively, the principles apply directly to expedition work.
— Martin
Gear knowledge is only half the picture
Building the right kit gets you to the location ready to shoot. Knowing what to do when you get there is what separates good images from great ones.
Bissig’s site covers action photography techniques built from years of commercial and editorial expedition work across mountain environments. You will find practical guidance on capturing fast-moving subjects, working in low light, and structuring shots that tell a story rather than just document a place. For photographers who want to go beyond gear selection and develop real field technique, the outdoor photography portfolio and resources at Bissig show what is possible when the right equipment meets deliberate craft.
FAQ
What camera body is best for expedition photography?
A weather-sealed full-frame mirrorless body is the top choice for expedition work. The Sony A7C II at approximately 514g offers full-frame quality without the weight penalty of larger bodies.
How many lenses should I pack for an expedition?
Three lenses cover most scenarios: a 16-35mm wide-angle, a 24-70mm standard zoom, and a 70-200mm f/2.8 telephoto. Trekking expeditions can reduce this to two lenses to save weight.
How do I protect my camera gear from moisture on expeditions?
Use waterproof backpacks or dry bag liners, rain covers, and 3–5 silica gel packets per camera bag. Replace silica packets when they change color from blue to pink.
How much does a full expedition photography kit weigh?
A comprehensive vehicle-supported kit including two bodies, three lenses, a drone, tripod, and accessories weighs approximately 10.6 kg. Trekking kits should target significantly less by cutting to one body and two lenses.
Can I use a smartphone as part of my expedition photography kit?
Yes. Smartphones work well as secondary cameras for quick shots, scouting, and social content. National Geographic-affiliated expedition leaders use them extensively to keep packs lighter and more agile.


